Vehicle Extrication
Heavy Vehicle Extrication Technician
The 4-Step System
1
Vehicle Size-Up
The size-up role · happens as you walk up · every accident, minor or serious
i On Approach — Identify
- Type of vehicle — car, truck, SUV, bus, commercial, EV?
- Number of vehicles involved
- Number of victims
- Ejected victims — look beyond the vehicle
- Car seats
- Status of vehicle — running? in drive or park? position / orientation?
! Identify Hazards
Smoke
Sharp Metal
Debris
Fire
Powerlines
Hazmat
Fuel/Oil Leaks
Traffic
? Type of Entrapment
Just a door pop?
Simple, fast access
Serious damage?
Prolonged extrication
Upside down?
Roof / inverted
Crushing?
Patient pinned / compressed
Guiding Principle
Try before you pry. Check the obvious first — doors and handles — before committing tools.
Declaration of Needs
The size-up role closes by calling out clear needs to the crew so everyone knows the plan.
“We need floor dry.”
“We’ll need to pop a door.”
“Prolonged extrication — we’ll need cutters, spreaders and a saw.”
- Call for additional ambulances
- Call for additional heavy rescue units
*Consider a helicopter for extended extrication times.
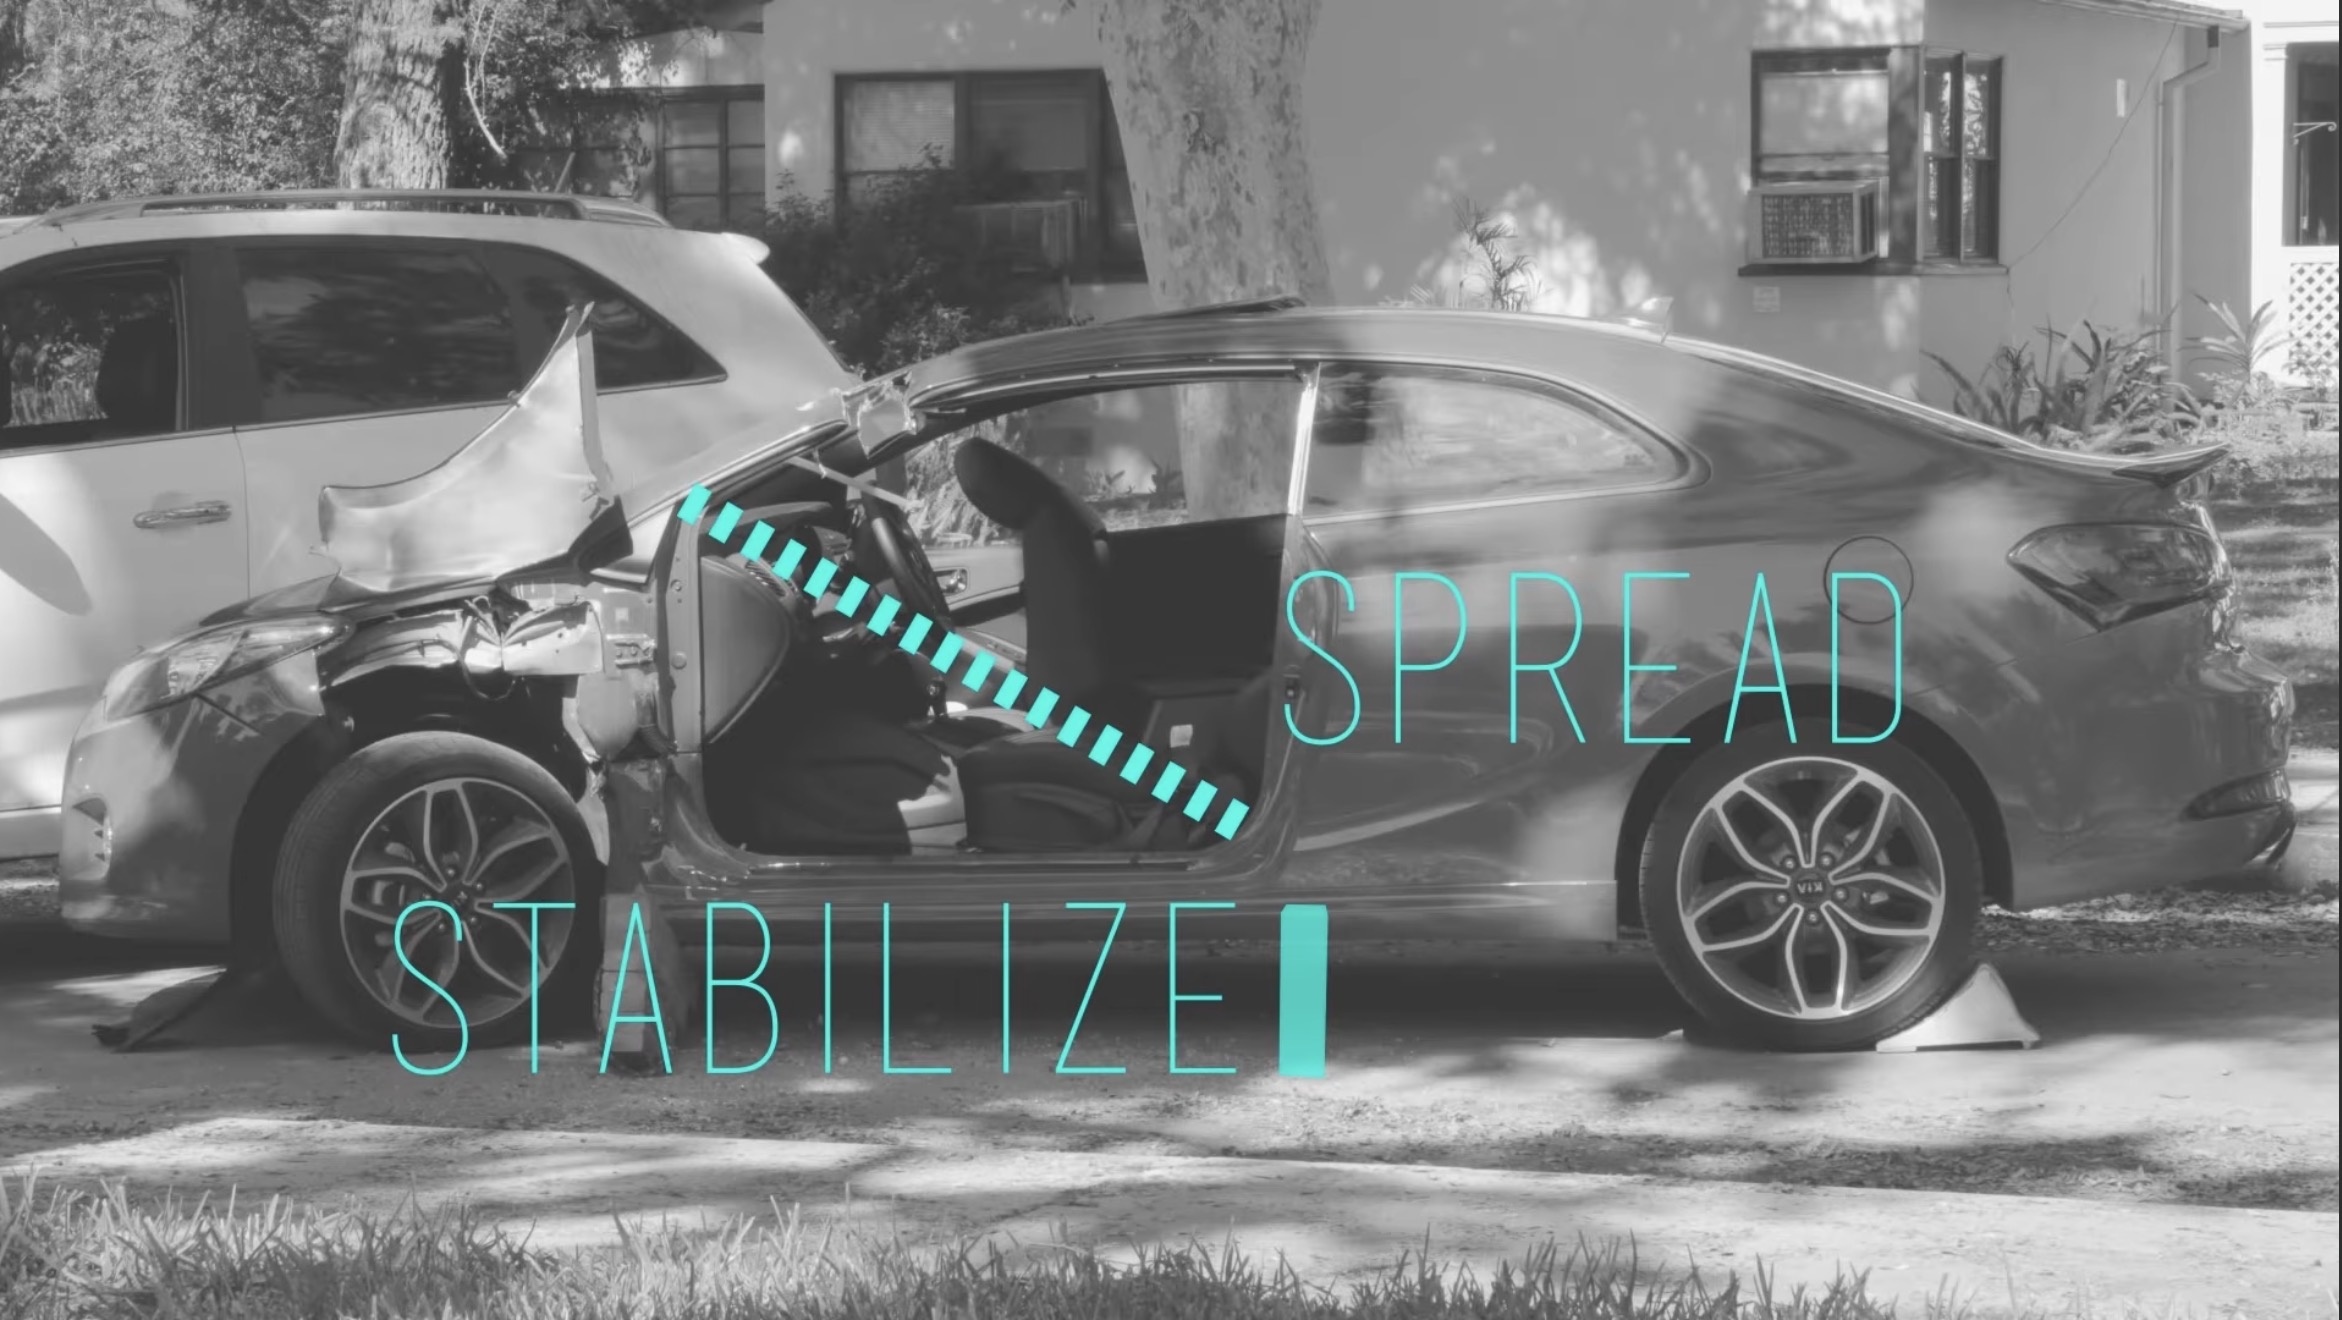
2
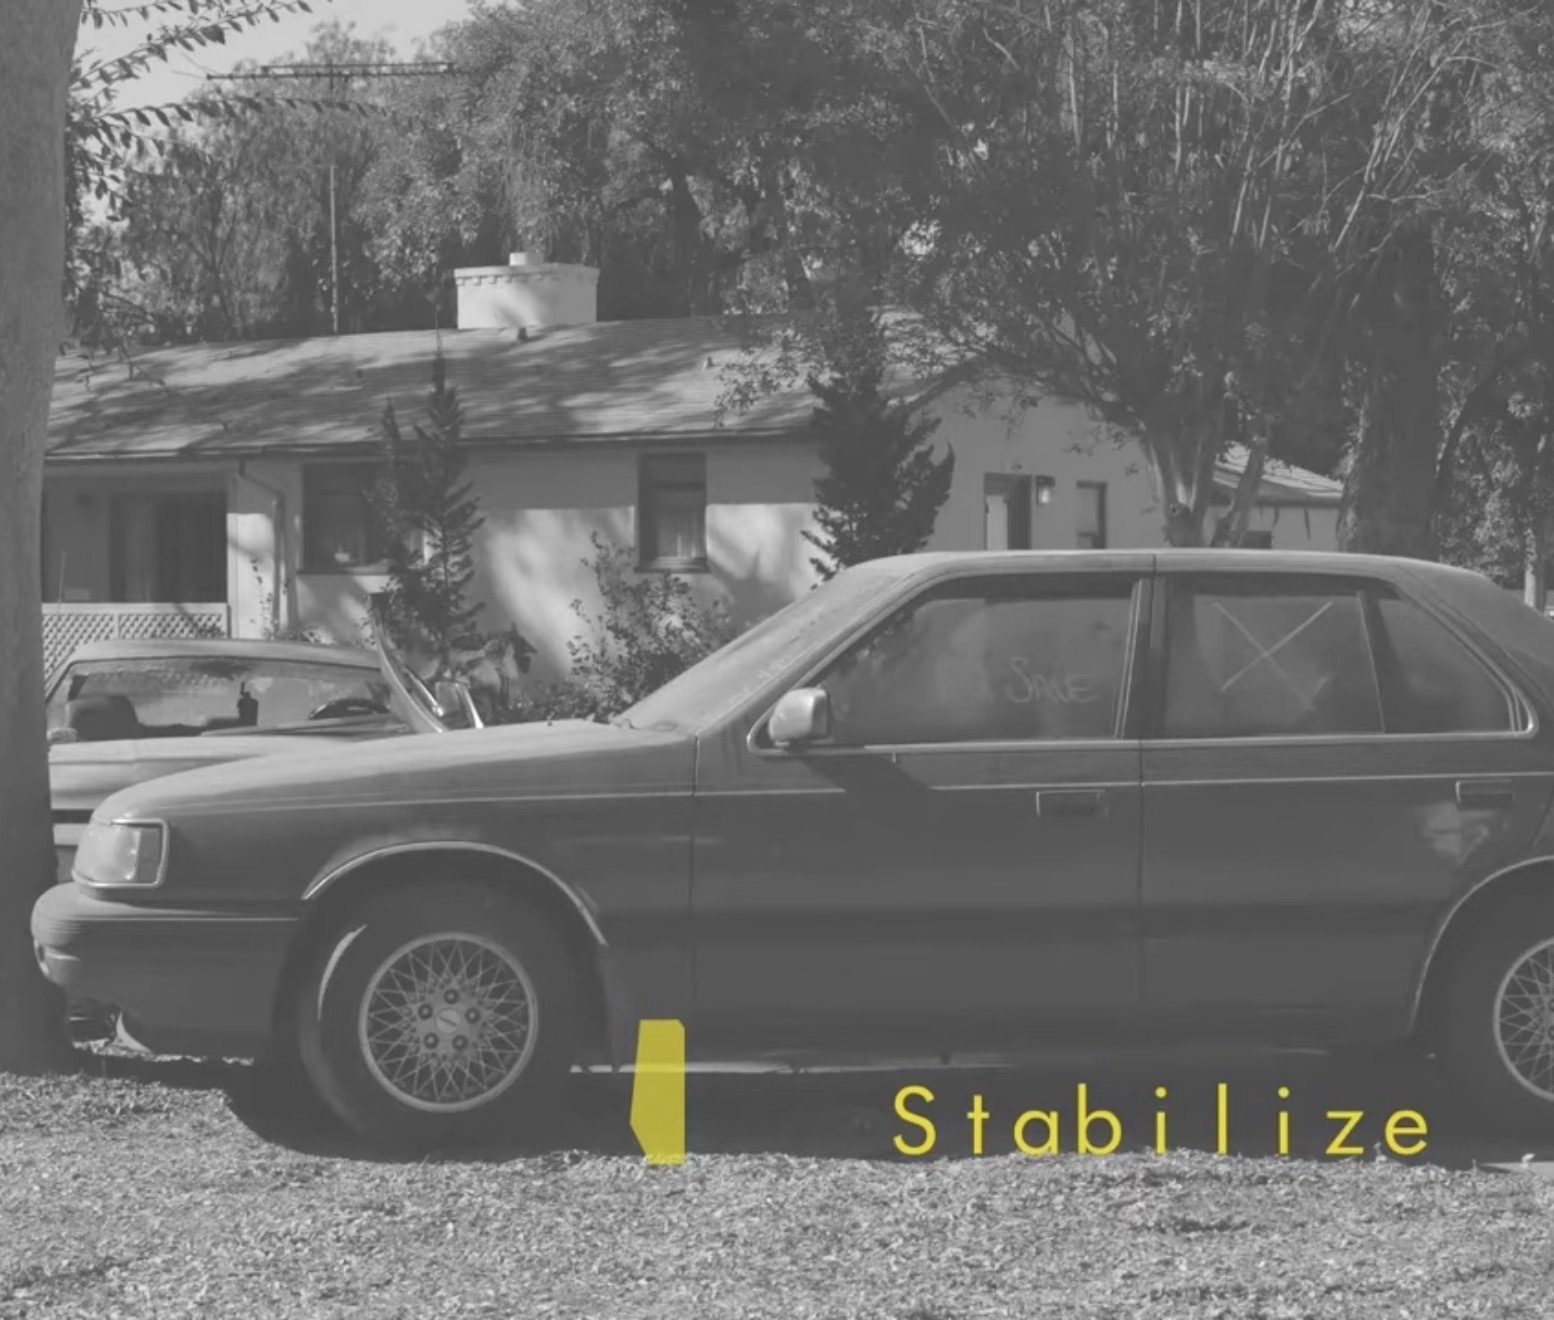
Stabilization
The stabilization role · simple steps first · gain control of the vehicle
A Vehicle Controls Put it in park, set the brake ›
- Put the vehicle in Park if possible.
- Set the parking brake if possible.
⚠ Hard Rule
Never put your head inside the compartment.
B Electrical System Keys, power, and airbag awareness — in order ›
- Turn the ignition off and remove the keys.
- Consider moving the occupant’s electric seat back and reclining it for easier access.
- Disconnect / cut the battery power.
Sequence Matters
Electric seats won’t move once power is gone — reposition the seat first, then cut power.
⚠ Hard Rule
Try not to reach directly over the steering wheel — undeployed airbag.
C Mechanical Stabilization — Movement ›
Goal: stop ALL vehicle movement.
- Stabilize the wheels — chock them, or deflate the tires (Halligan, or cut the valve stem).
- If off-balance / on its side / on its roof, vertically stabilize with struts — make the footprint wider and stronger.
⚠ Hard Rule
Never more than ONE knee on the ground. One knee only — stay ready to move.
D Stop the Crush When the vehicle is crushing an occupant ›
Goal: prevent any further crushing.
- Chock and stabilize the vehicle to stop it settling or shifting onto the occupant.
- Capture the load before any lift so it can’t drop back down.
3
Peel & Peek
The peel & peek role · open it up and expose hazards before cutting
■ Take Glass Safely
- Protect occupants — blankets, or tape the window if the patient is non-emergent
- Cut / remove the front windshield out of the way
Consider
The windshield doesn’t always have to be cut — on newer vehicles it adds to the structural integrity of the vehicle.
⚠ Hard Rule
Use breathing protection and eye protection when cutting the front windshield — fine glass particles can damage the lungs and eyes.
▤ Pull & Mark
- Pull interior trim
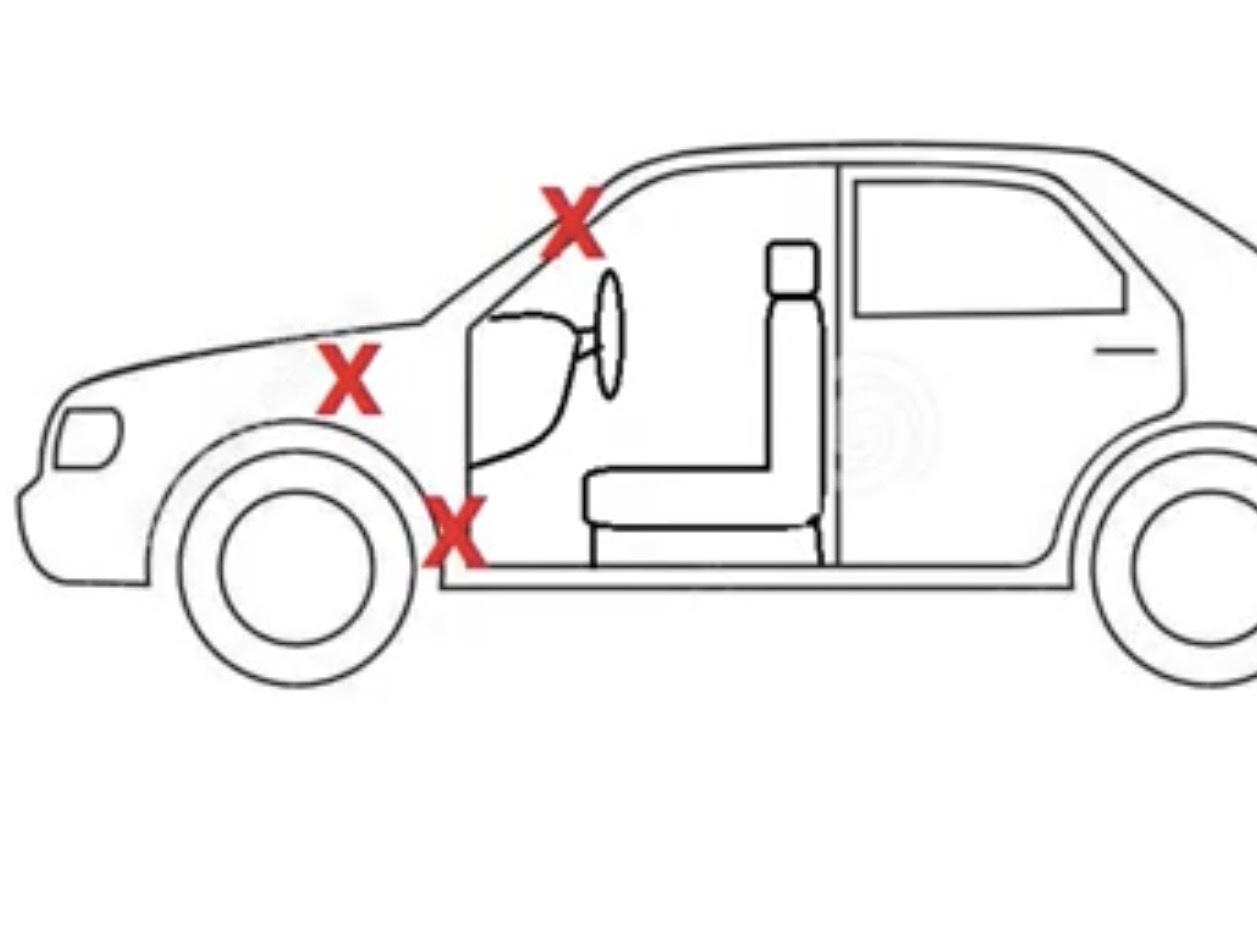
- Identify & MARK airbag cylinders
- Identify & MARK seatbelt pretensioners
- Make all marks on the outside of the vehicle — so the whole crew can see them
- Cut seat belts at a 45° angle — cleaner cut
⚠ Hard Rule — Cylinders
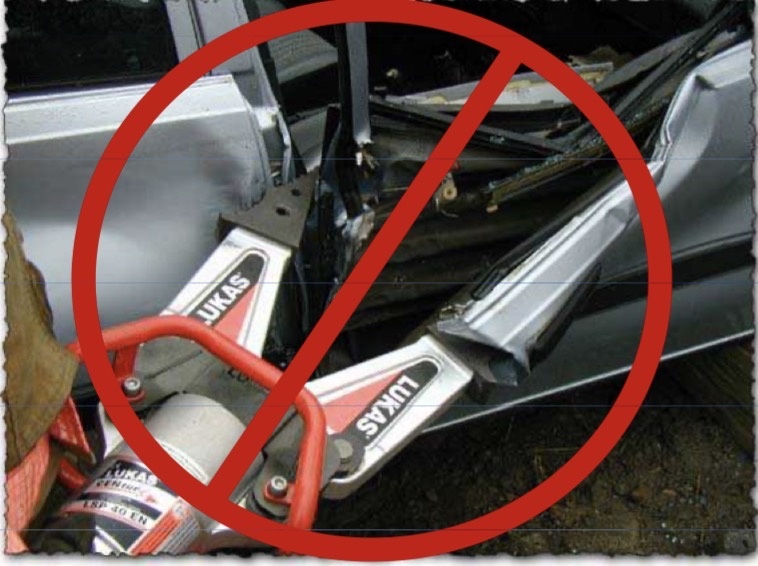
Cylinders must be identified and marked for the spreaders and cutters. They will explode and can kill if we damage them.
Good to know
Airbags themselves are safe to cut through — as long as you’re not cutting through a cylinder.
4
Tactical Operations
Pick the play the entrapment calls for · each tactic is a standalone section
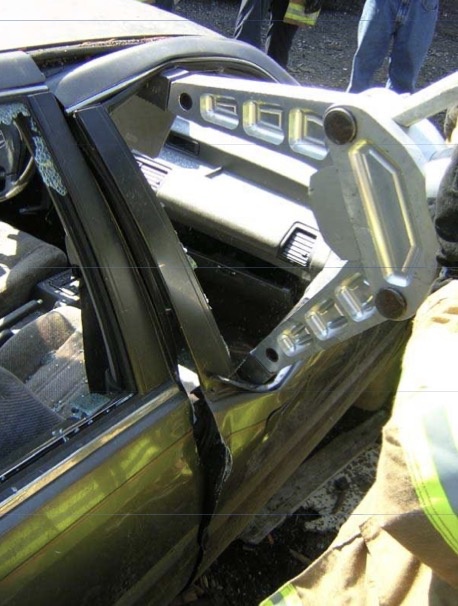
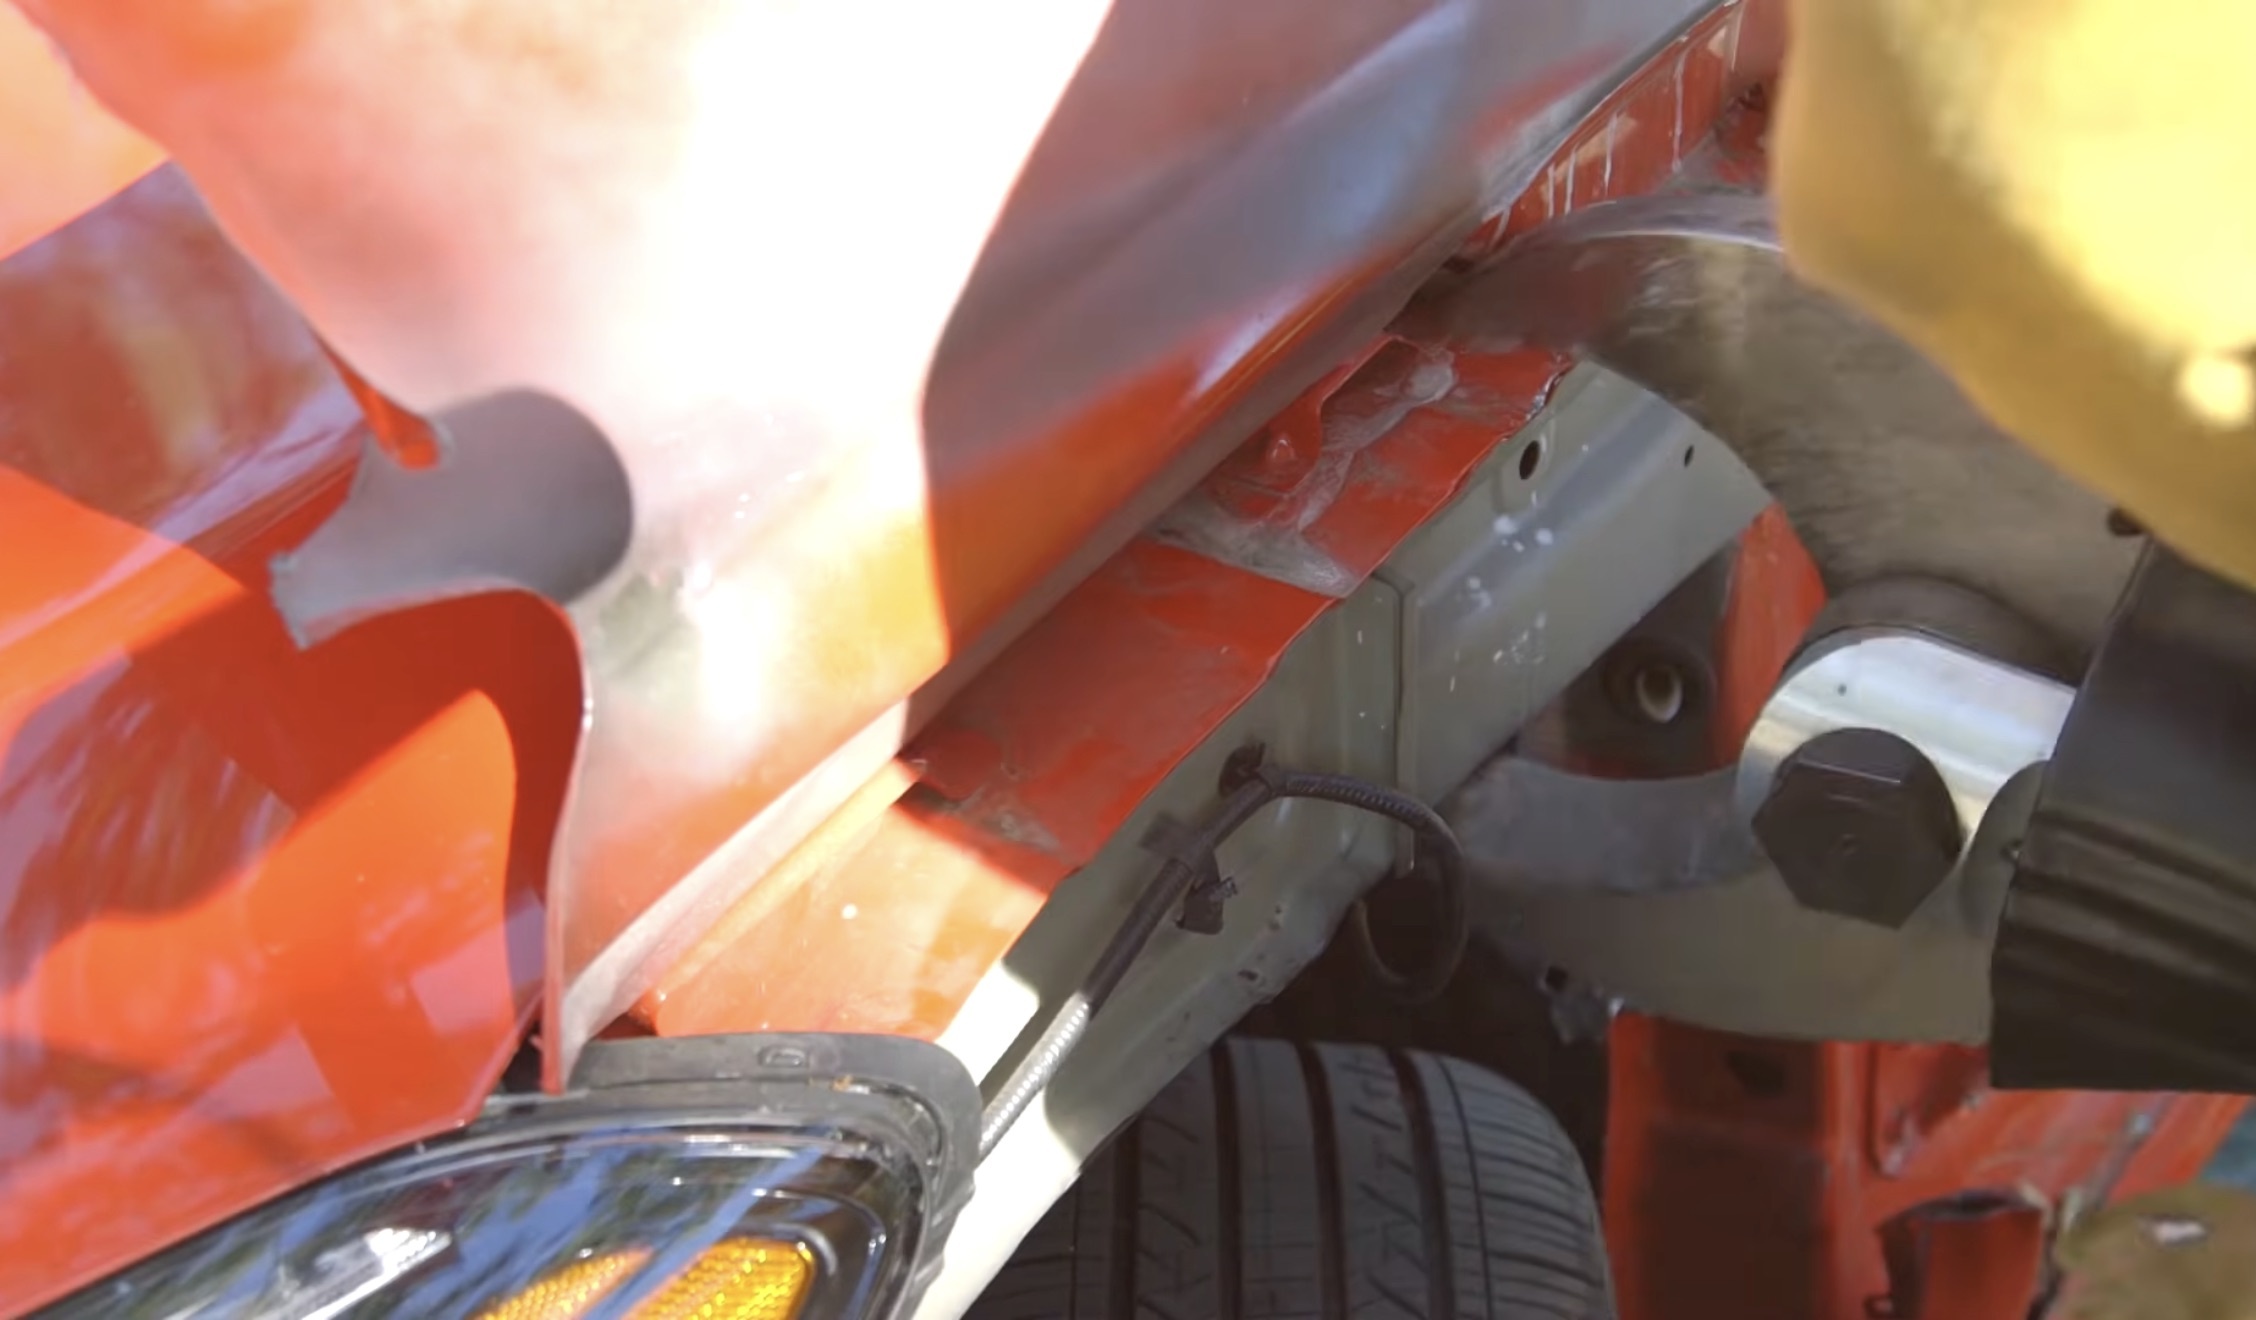
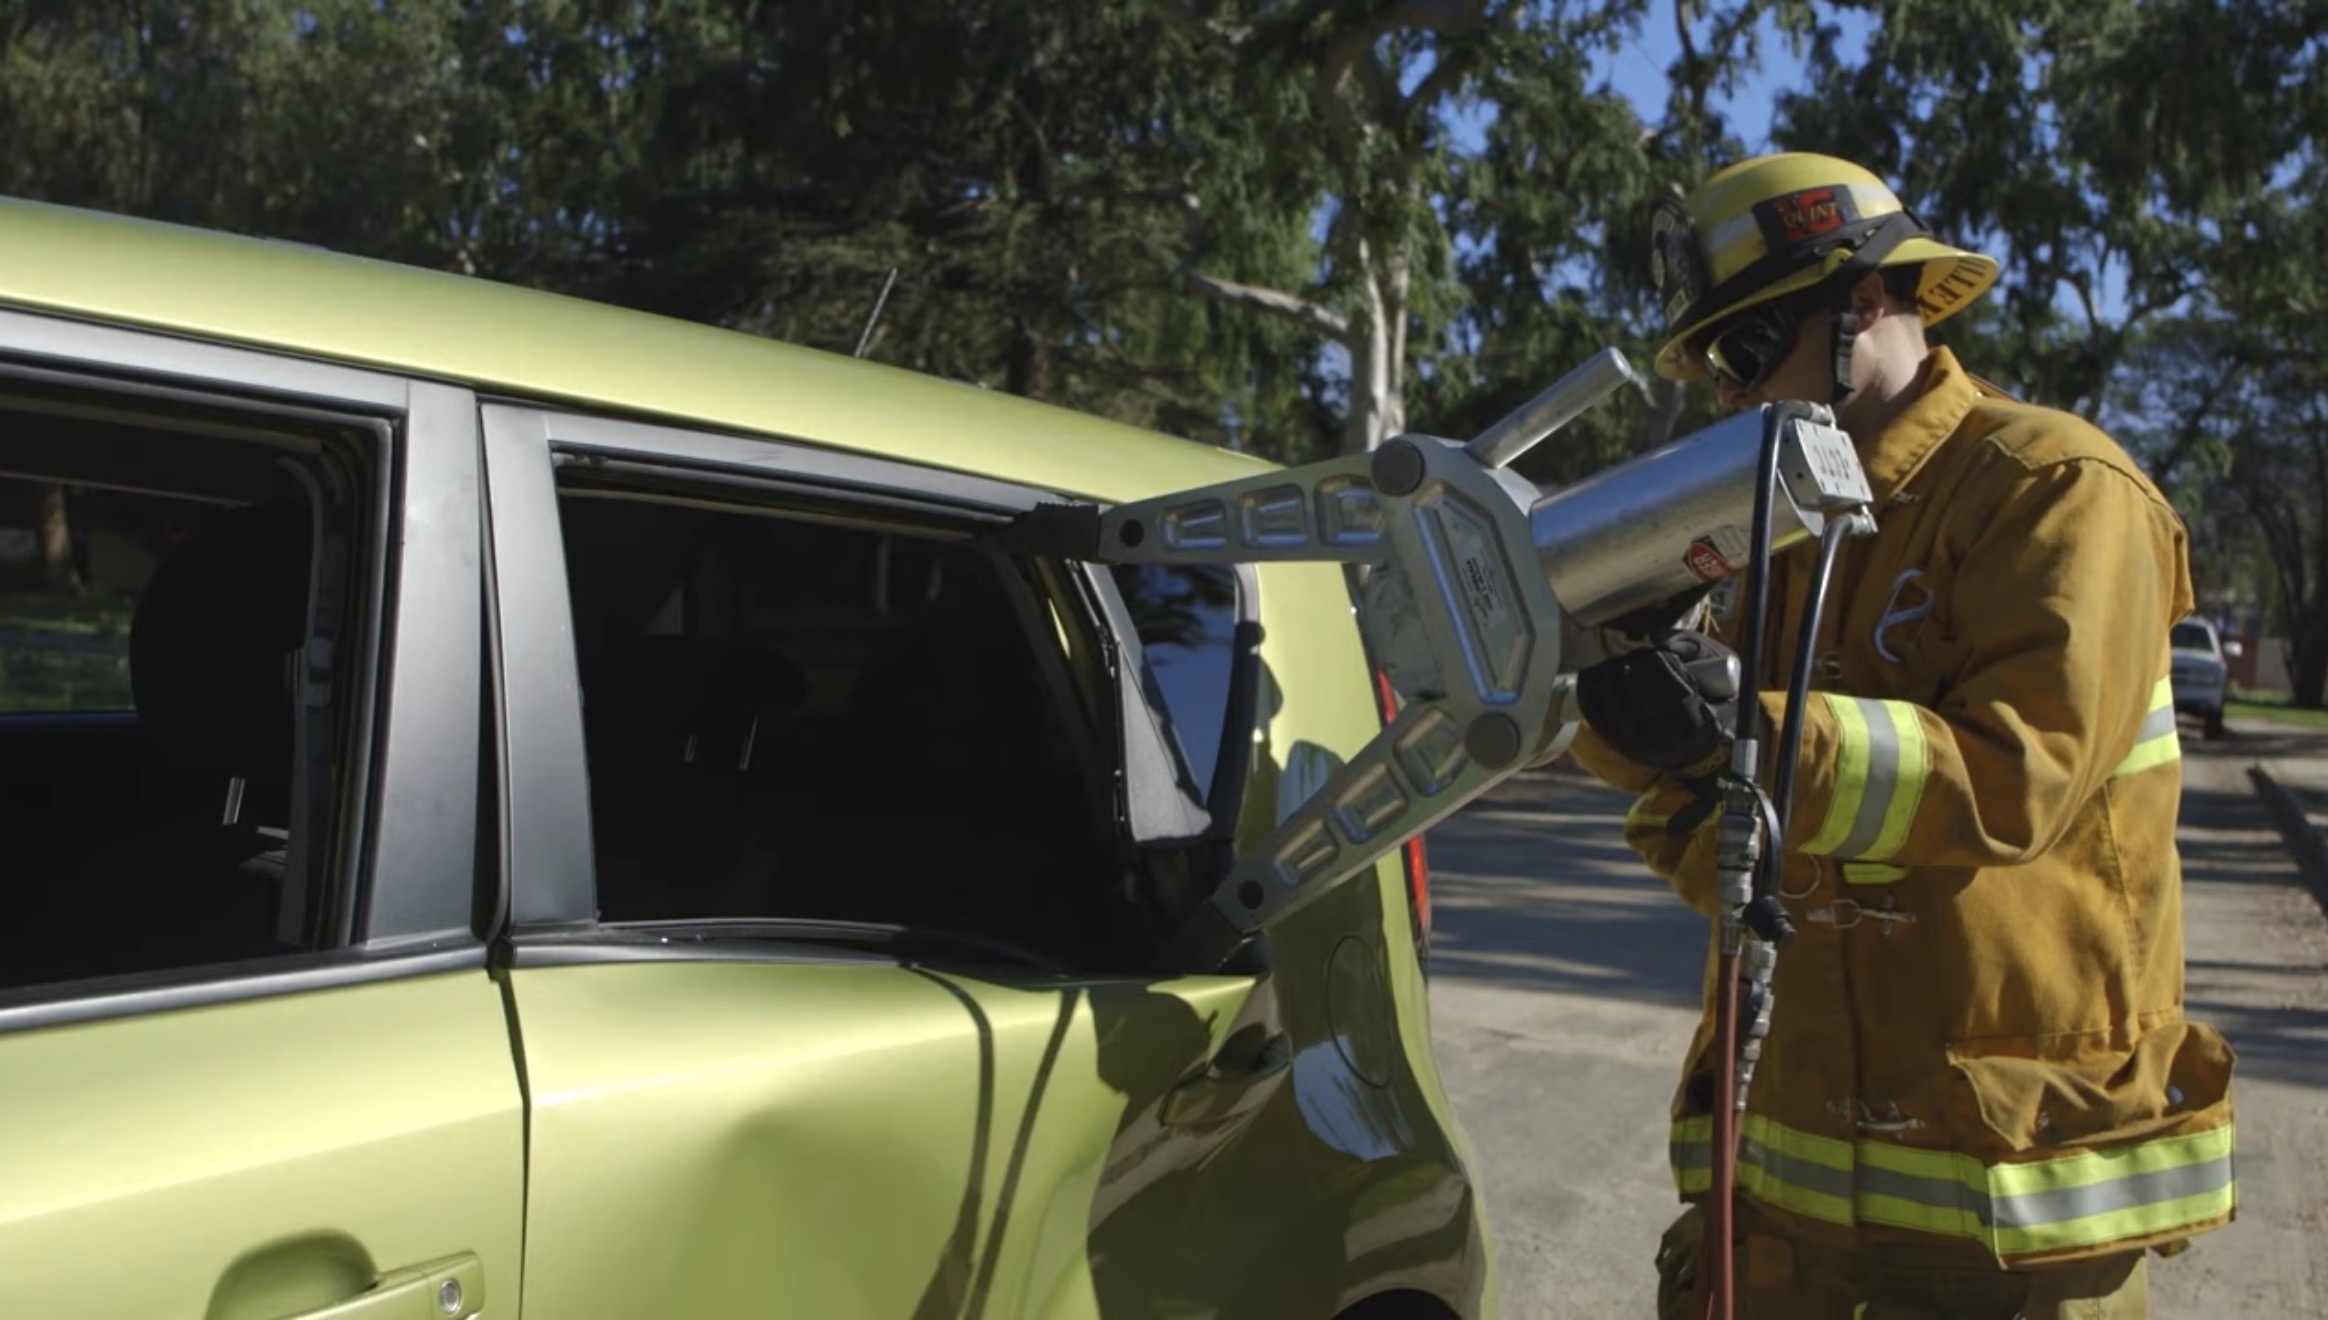
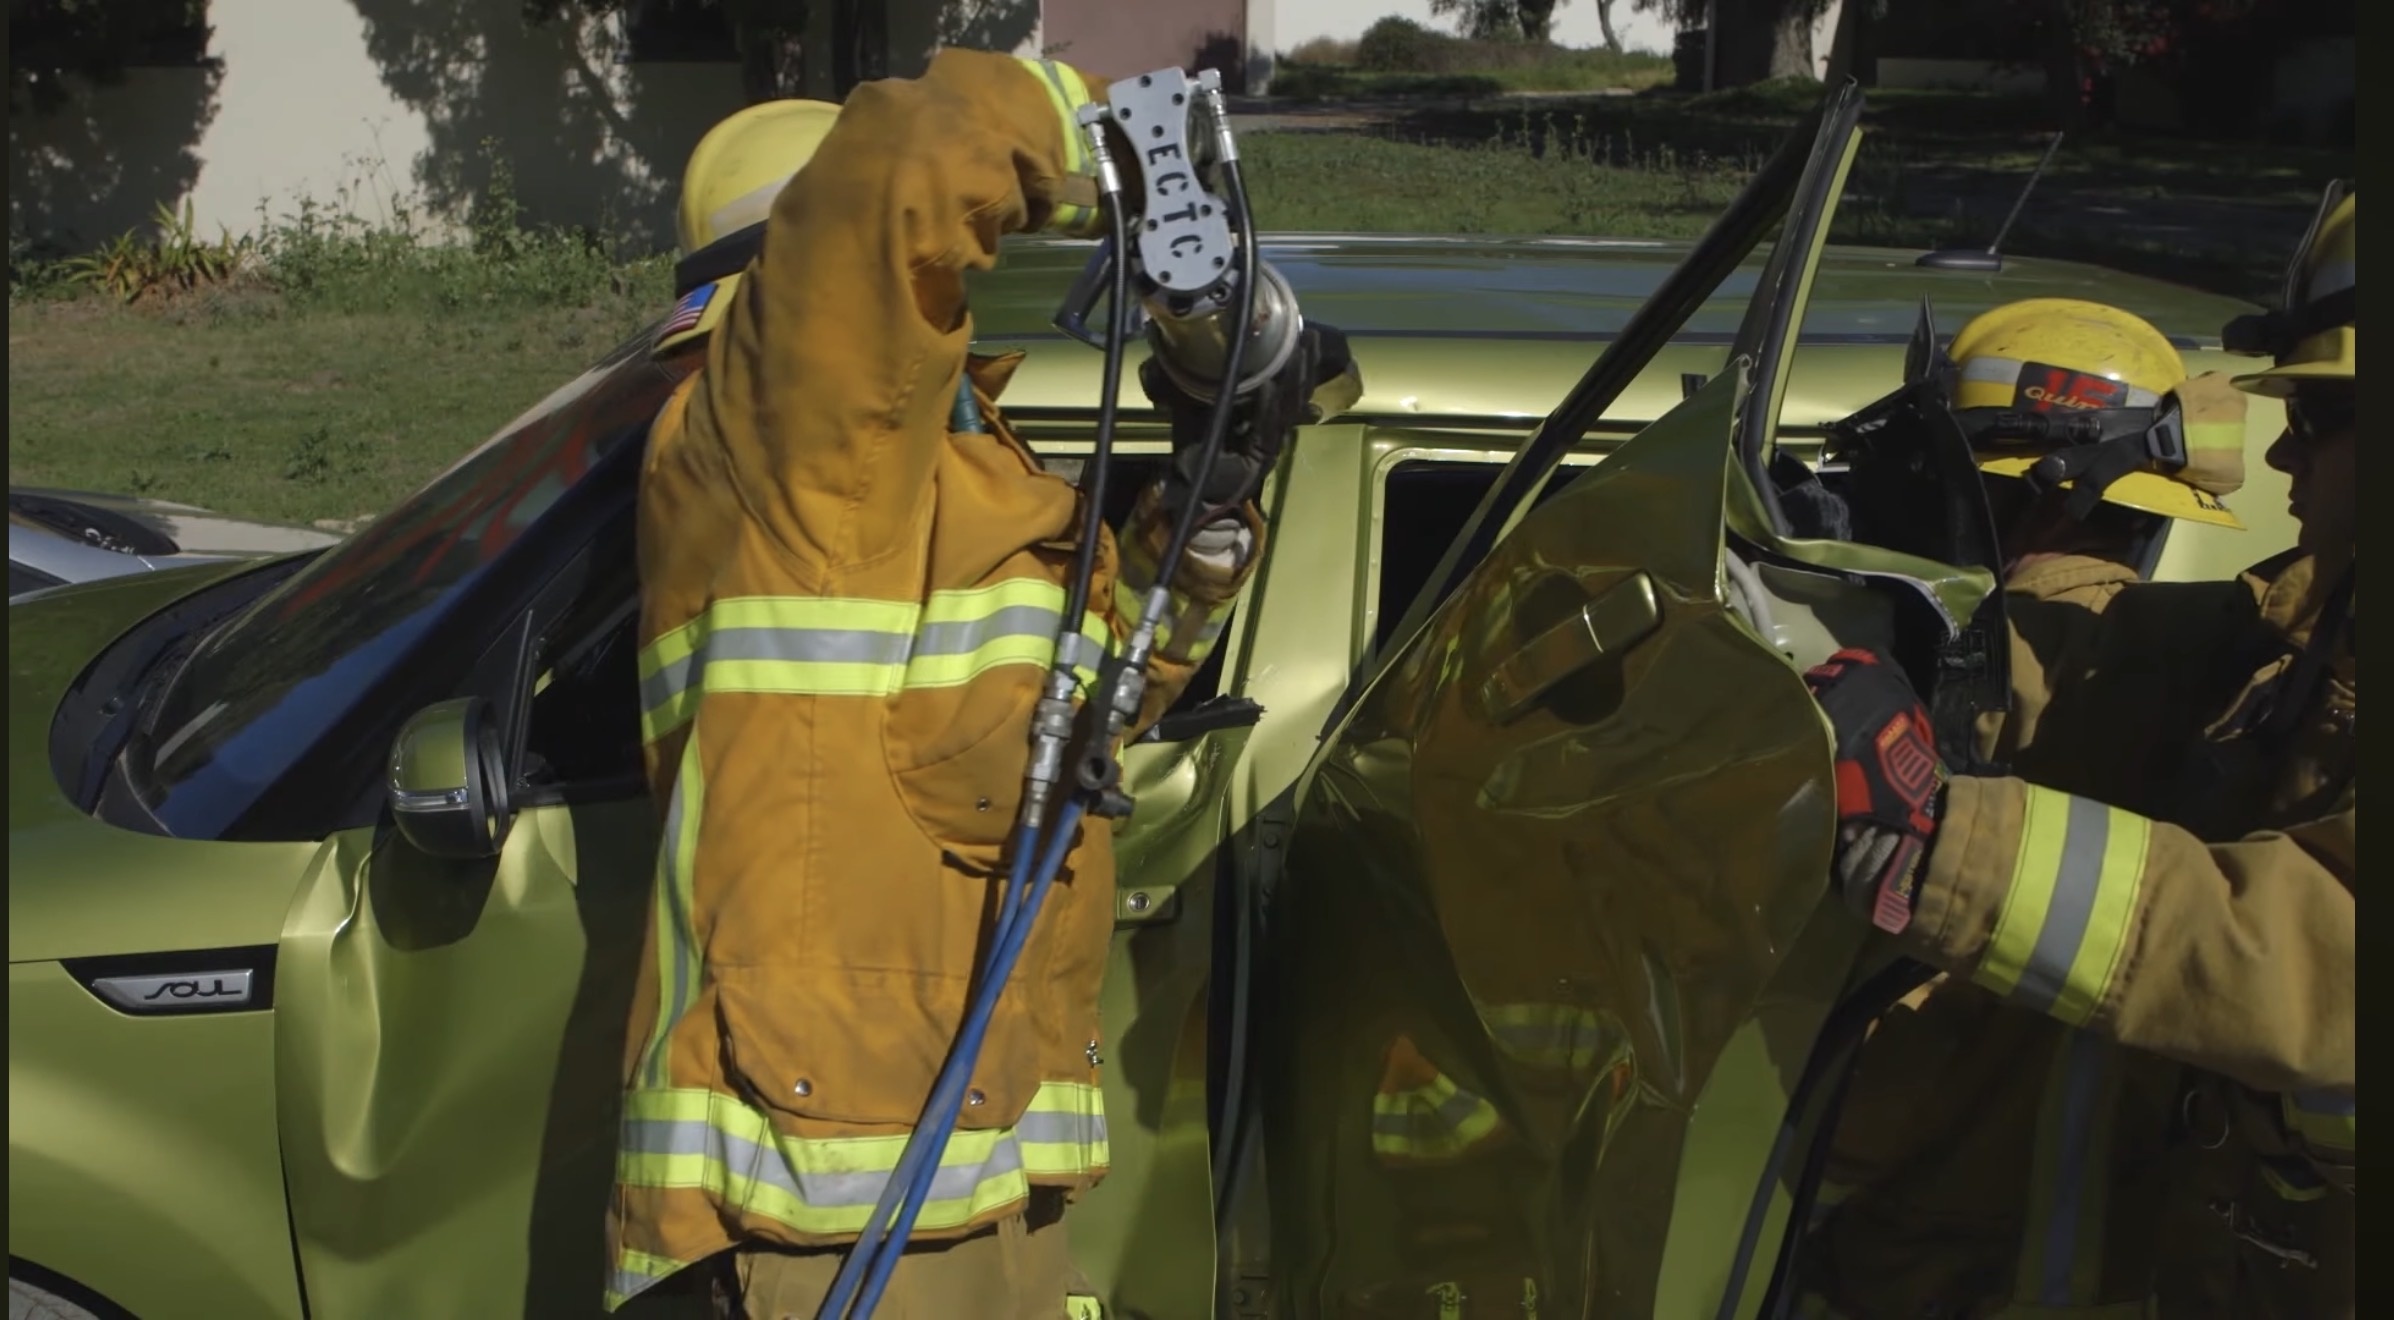
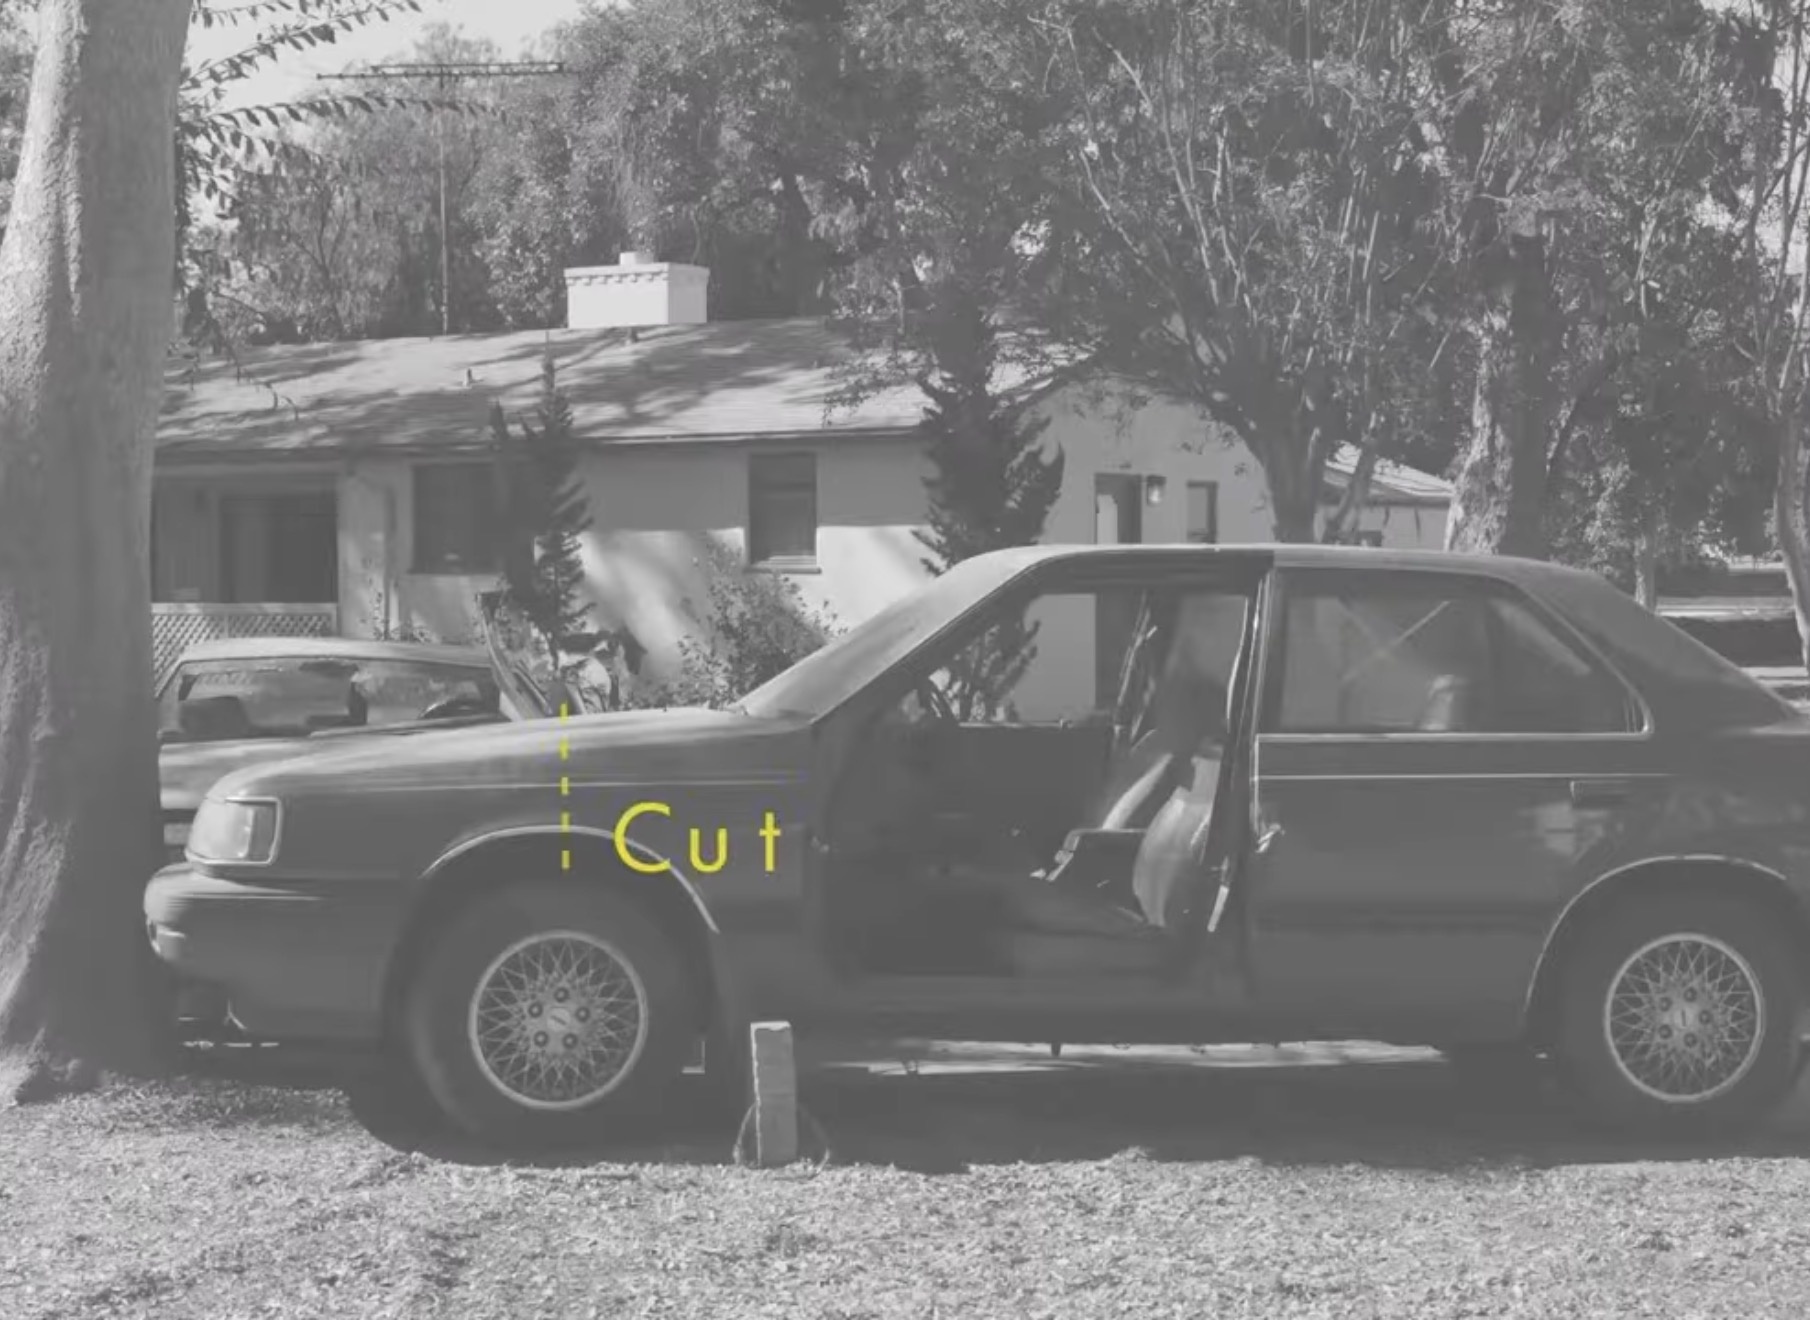
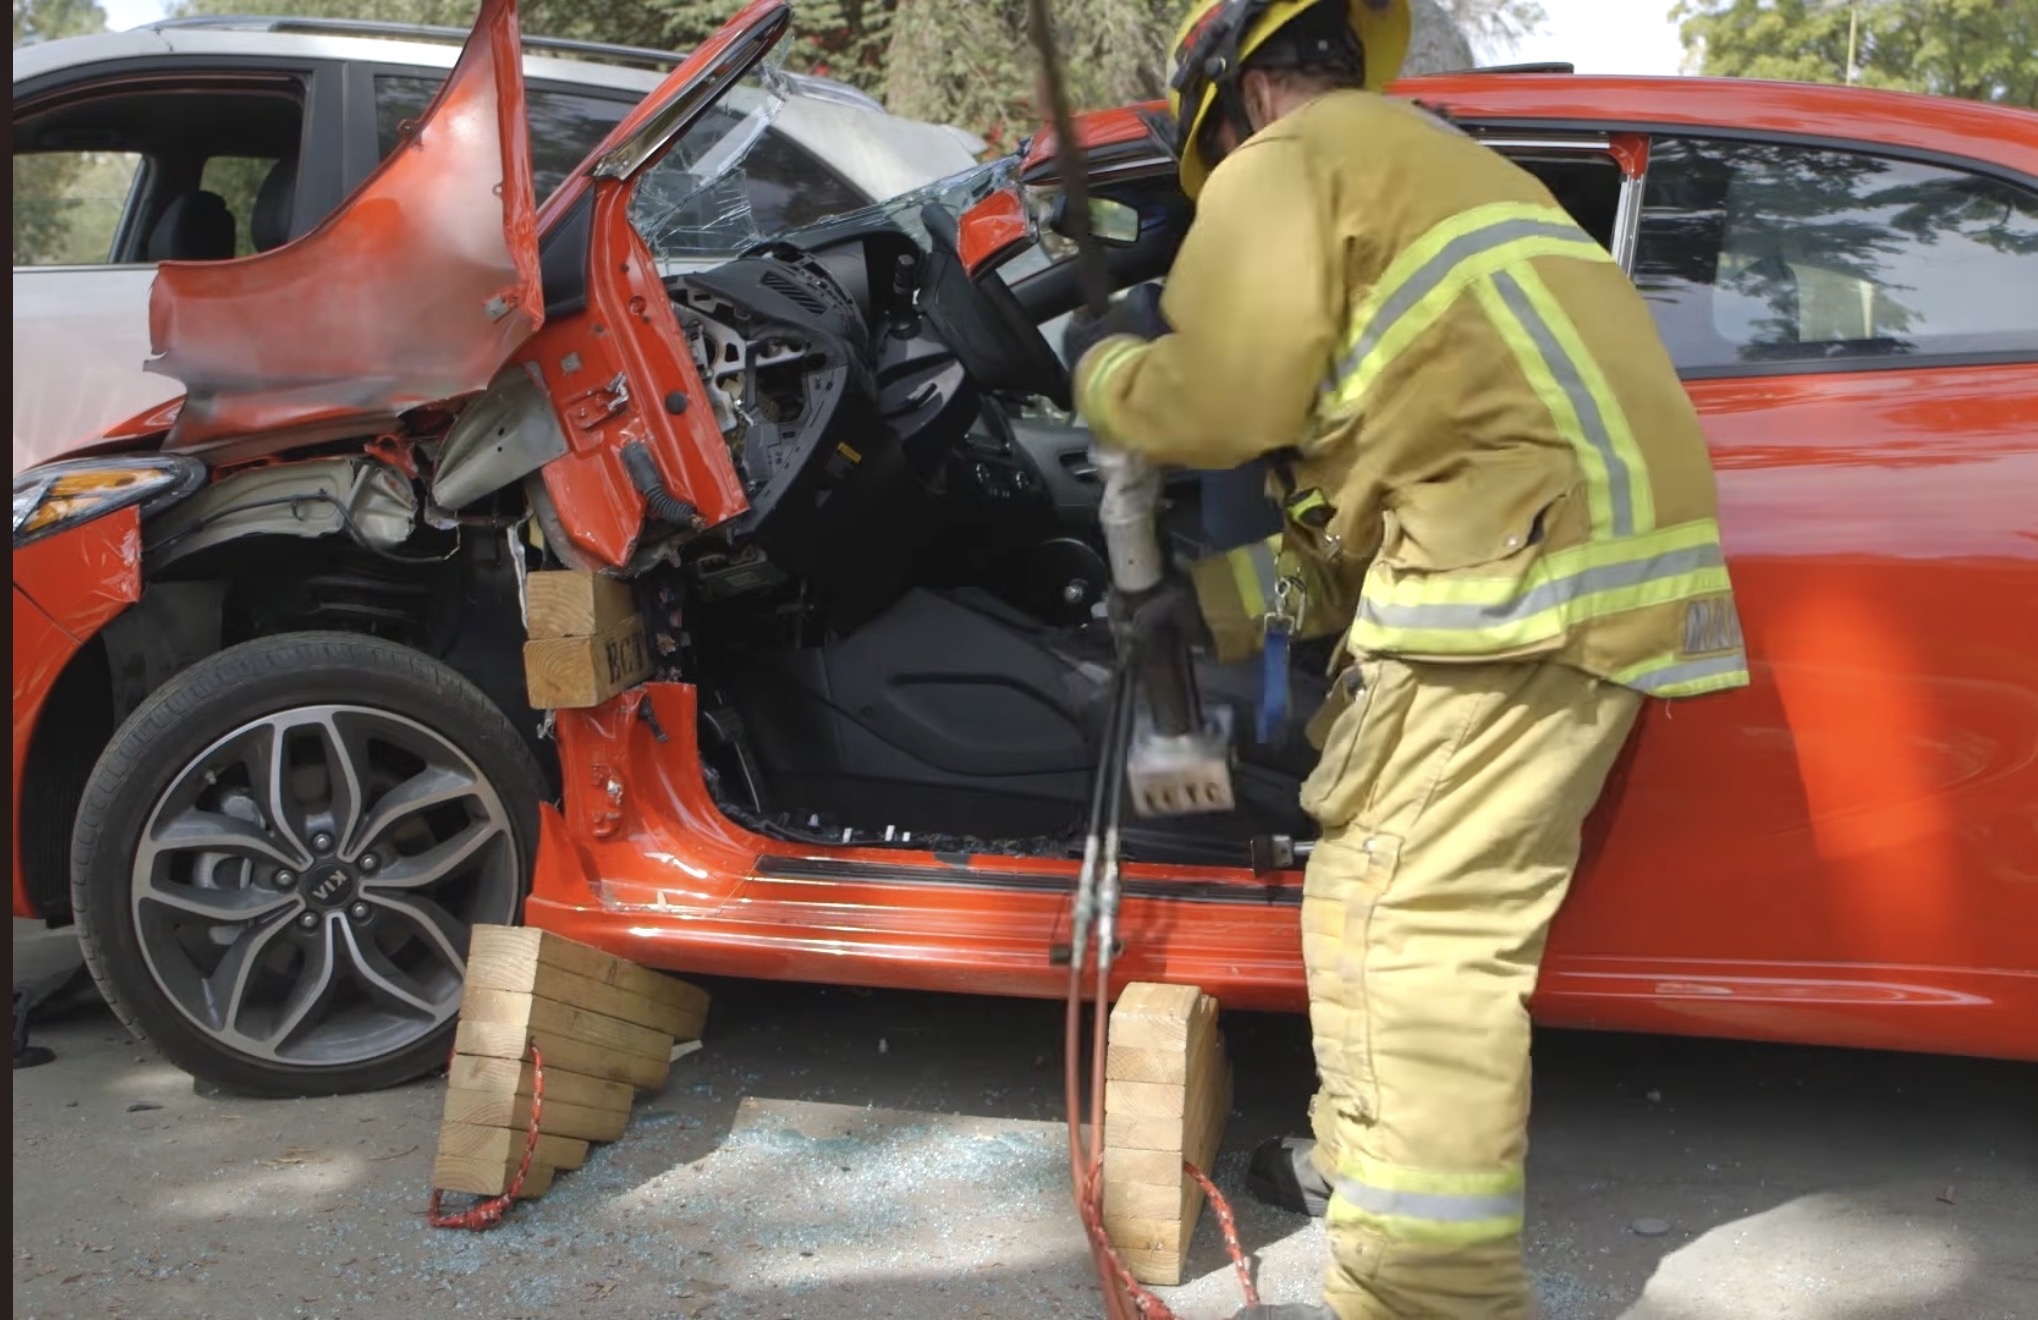
1 Door Removal: Hinge Attack Door removal ›
- Create a purchase point — crush the front fender.
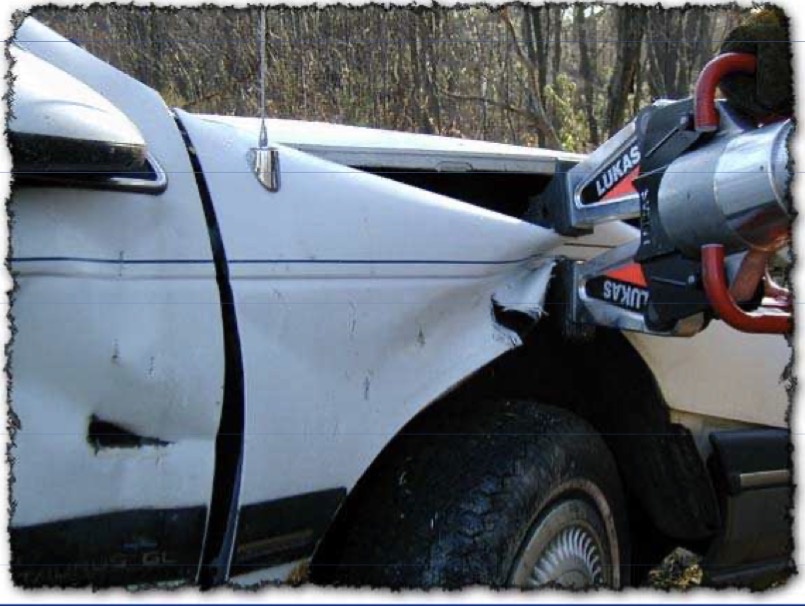
- Attack one hinge at a time. Start with the top hinge to push the door down, away from the patient.If needed, come in vertically from the top to use gravity.
- Attack the lower hinge.
- Keep spreading until both hinges are defeated.Keep the door intact — if the spreaders start peeling the outer shell away, reset deeper.
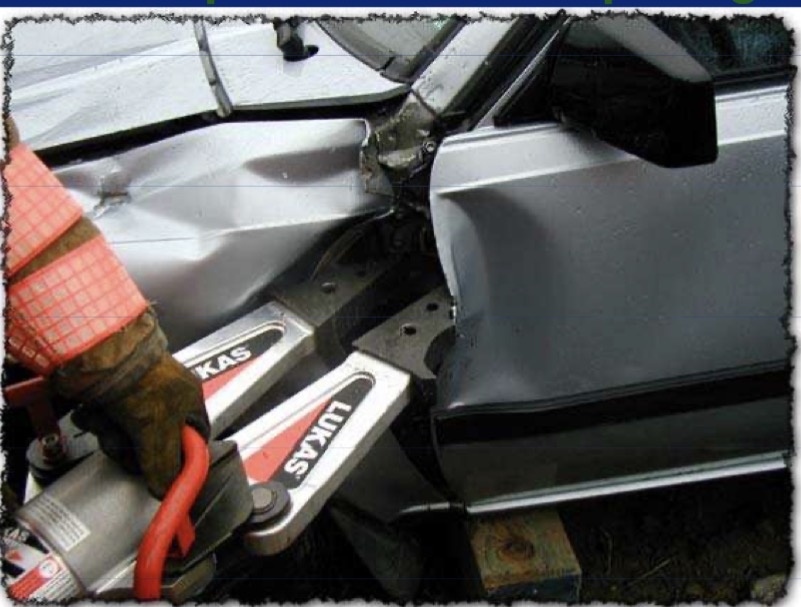
ToolsSpreaders · cutters · webbing
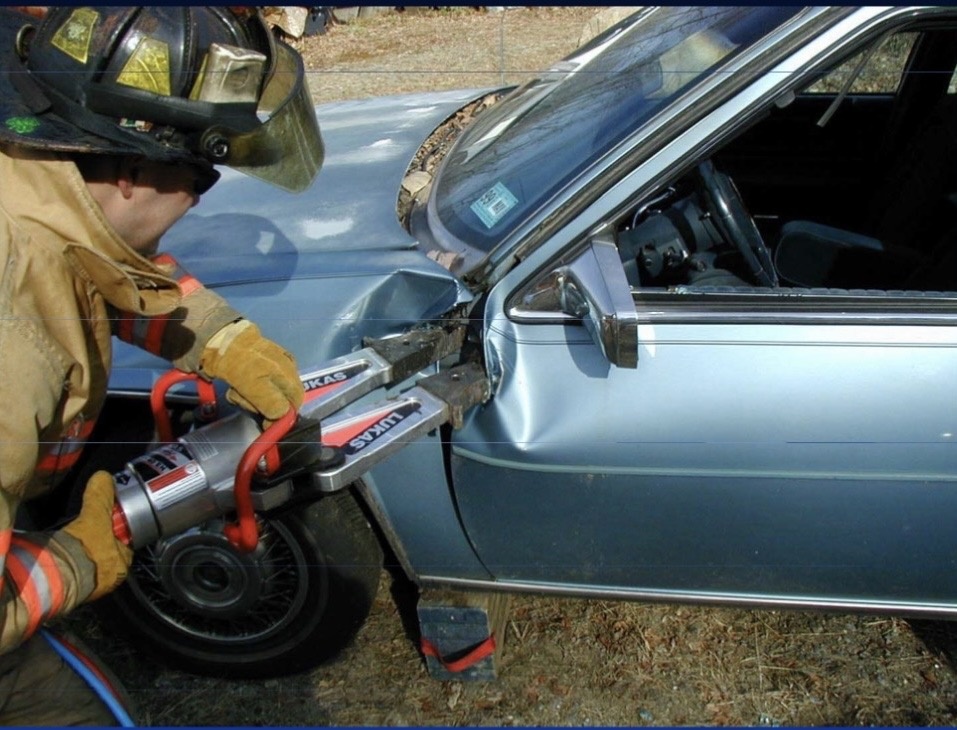
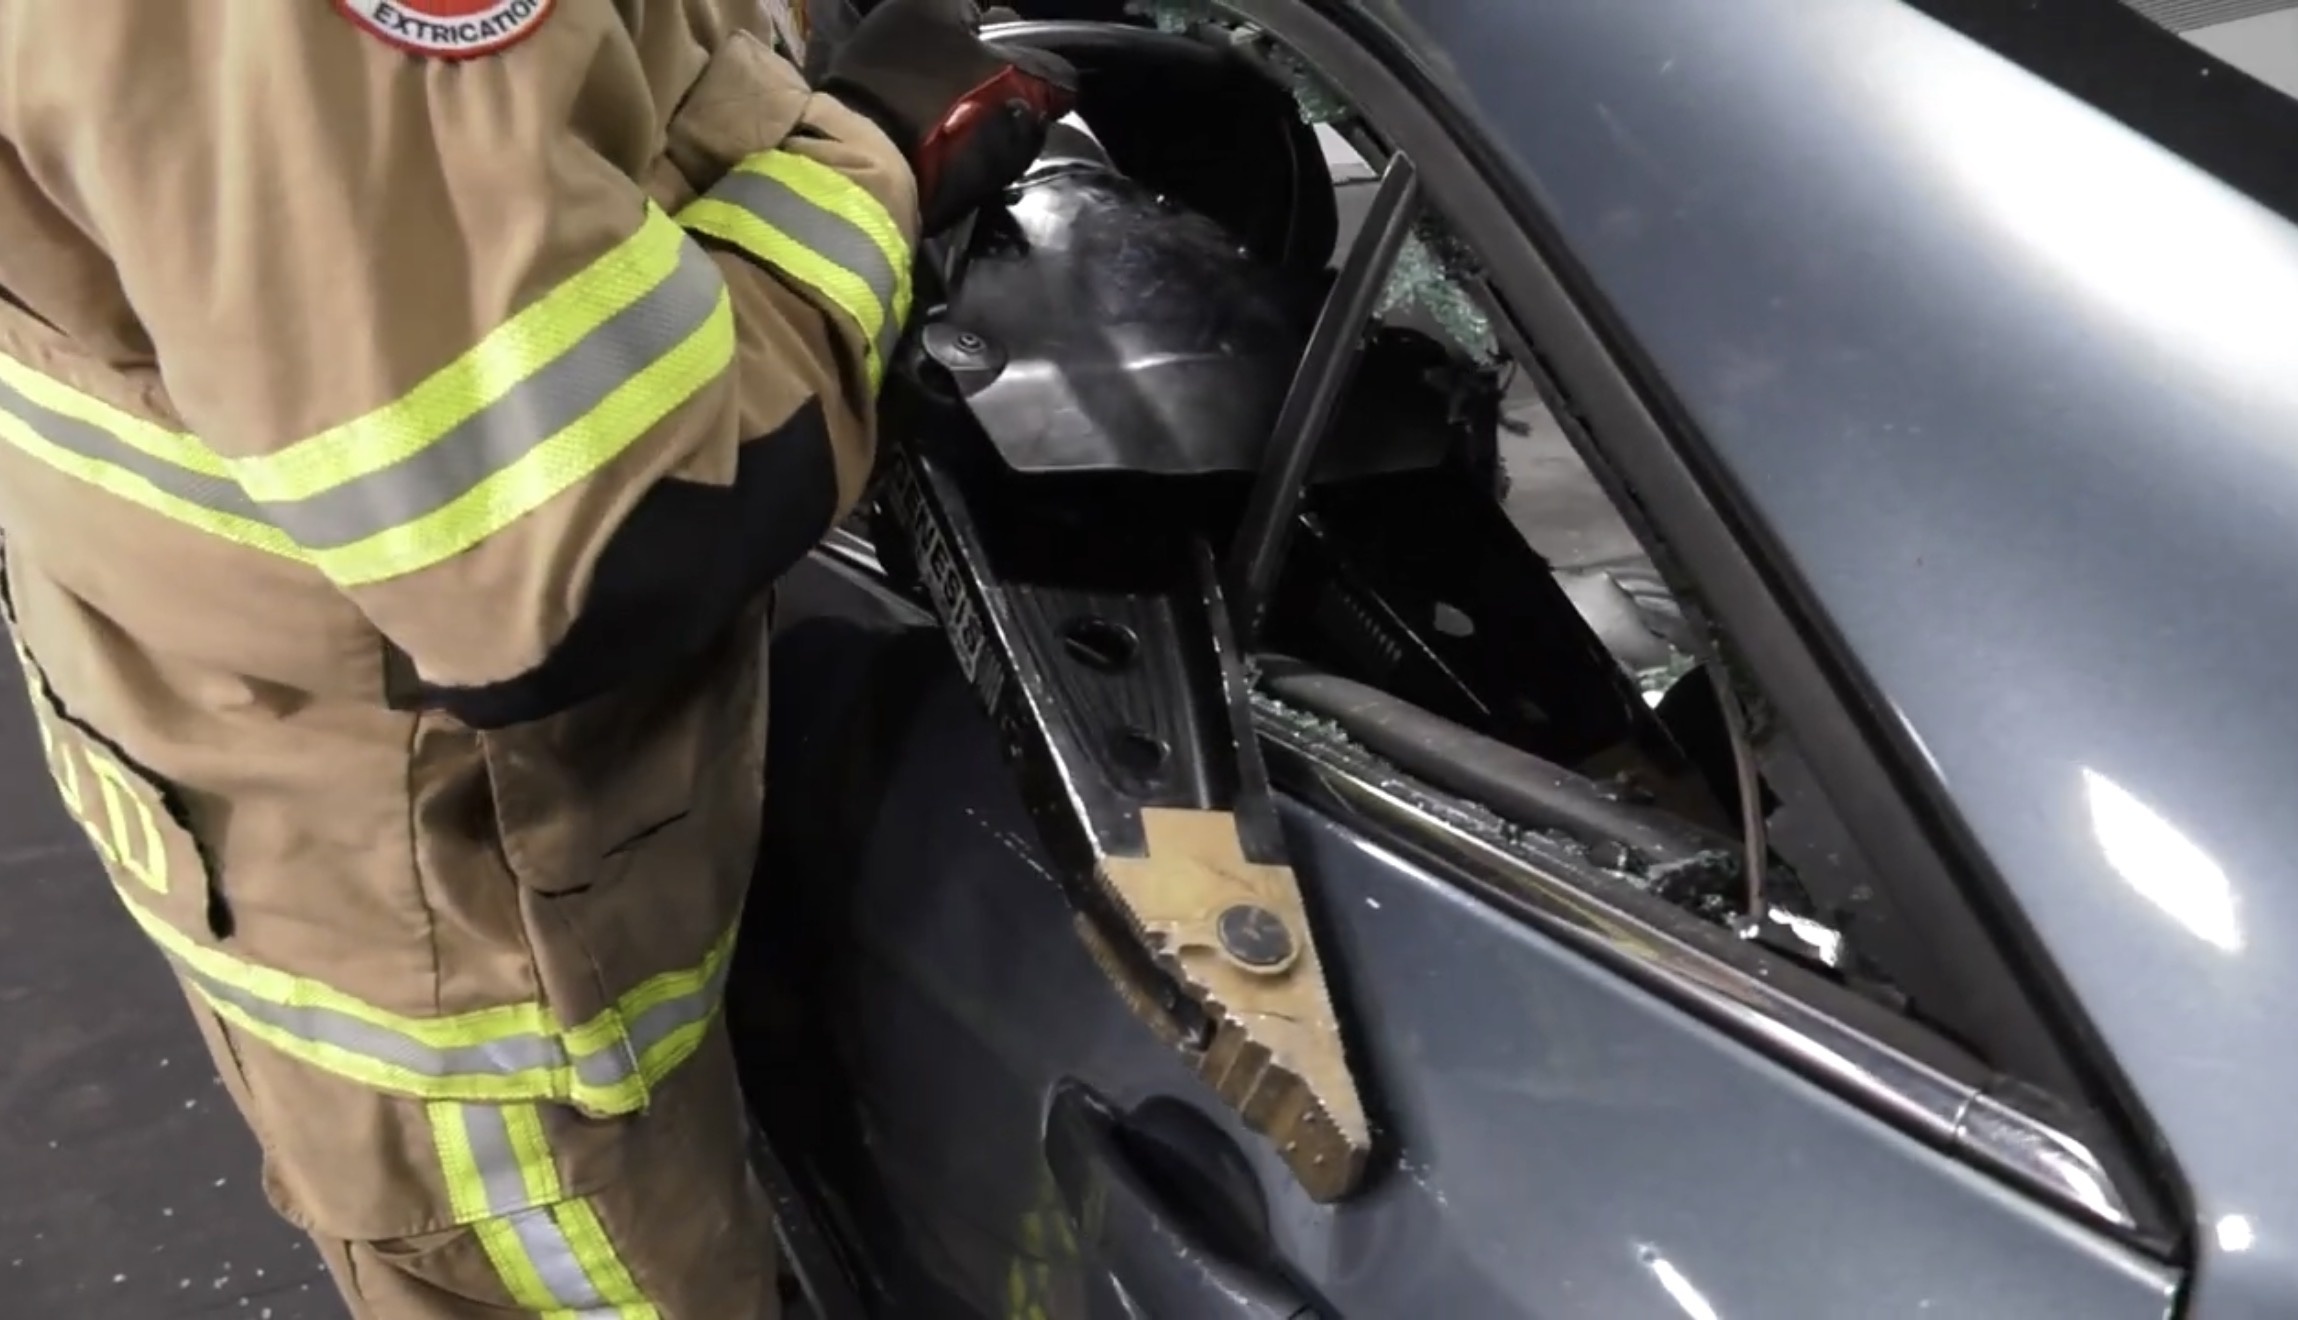
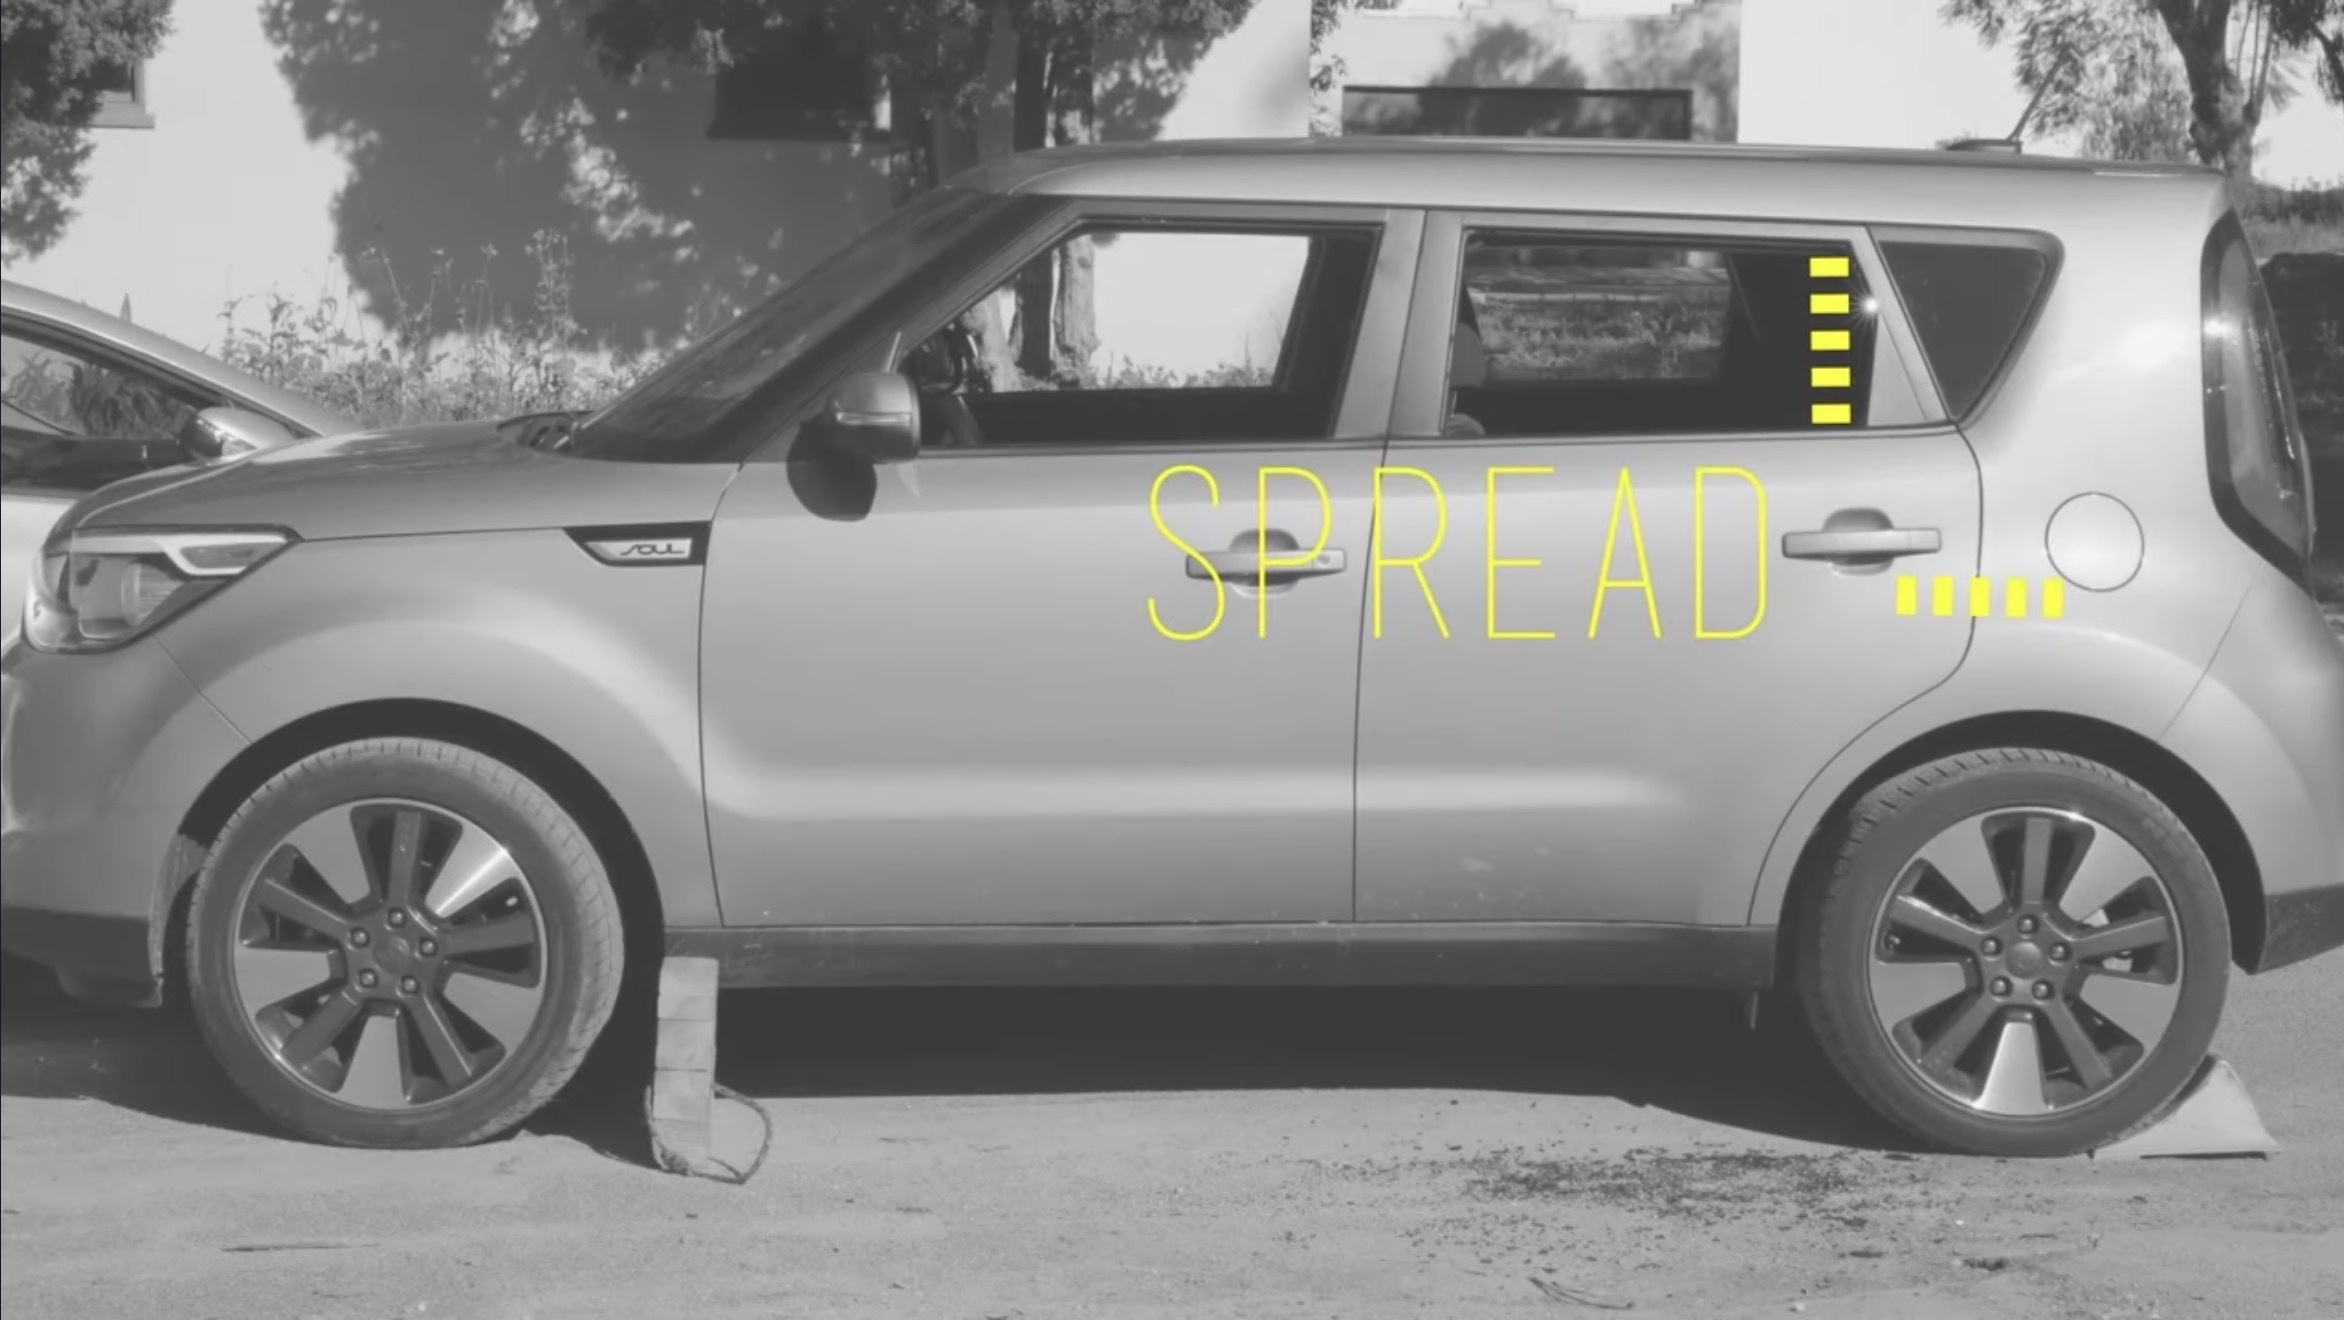
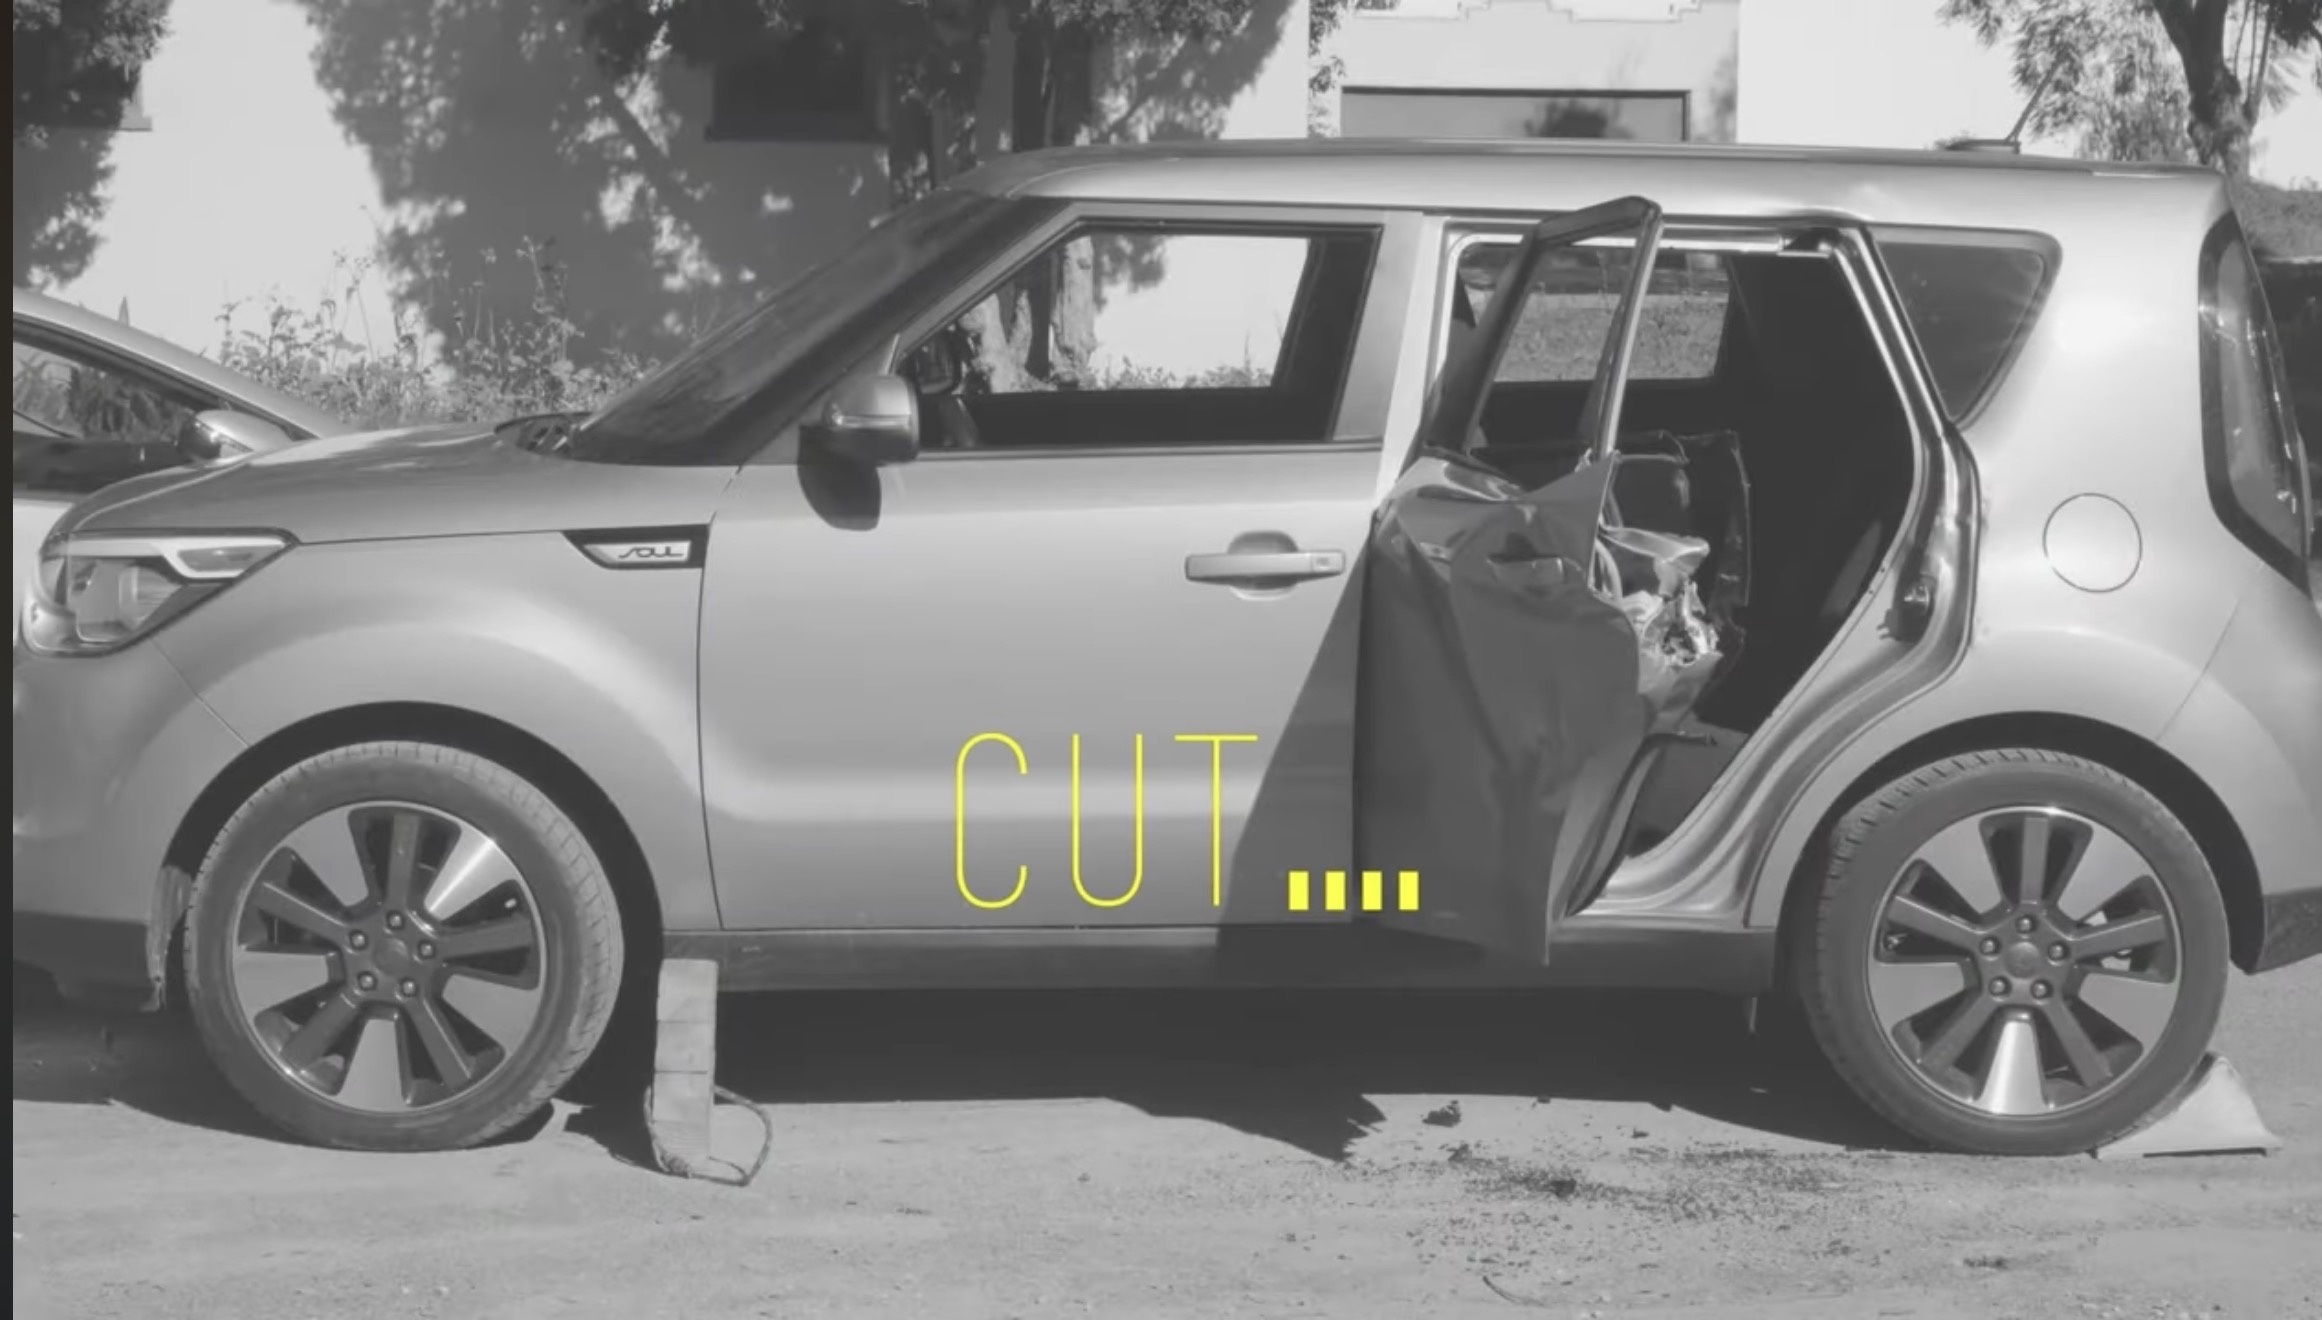
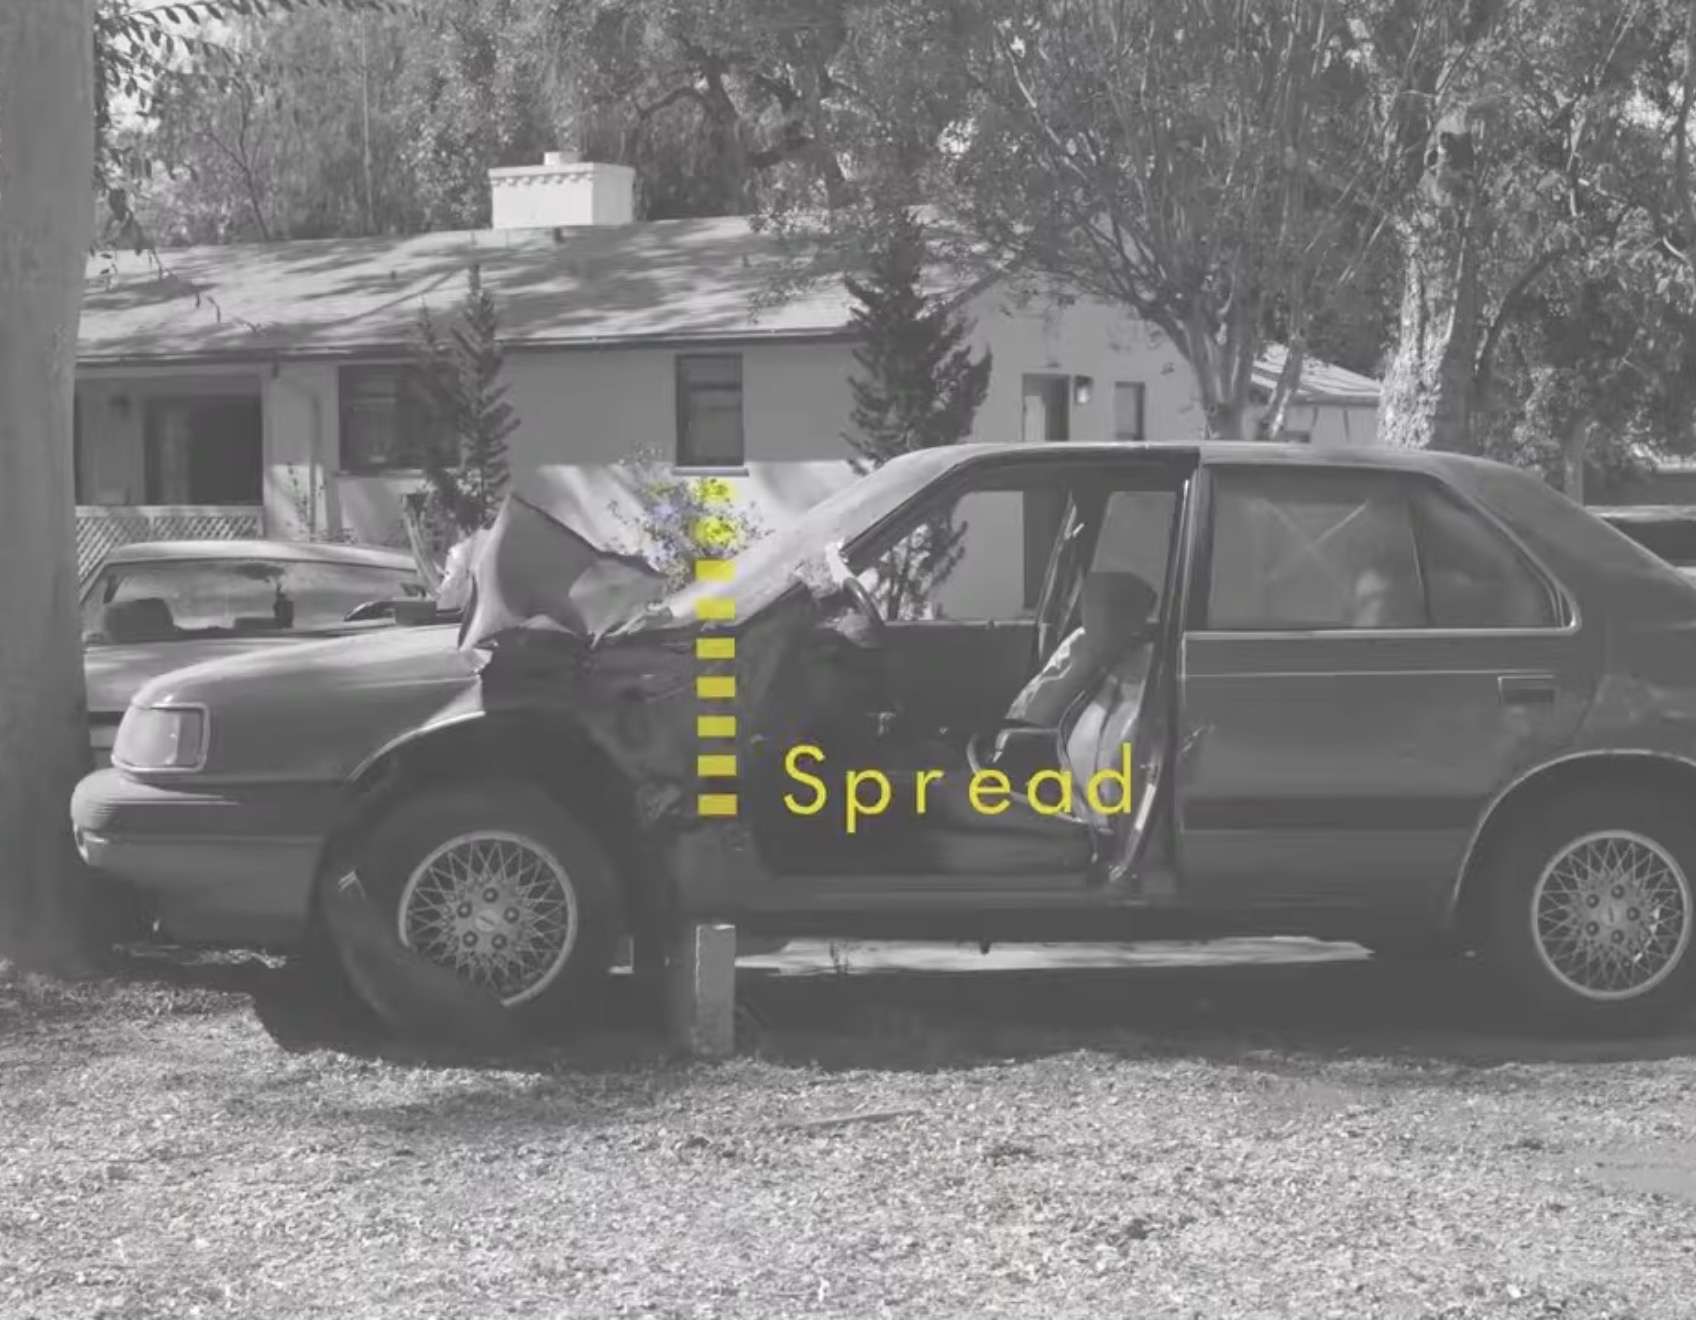
2 Door Removal: Pin Attack Latch side ›
- Create a purchase point — Halligan, spreader in the window, or spreader side-entry.
 Spread a little, then reposition deeper to avoid peeling the frame.
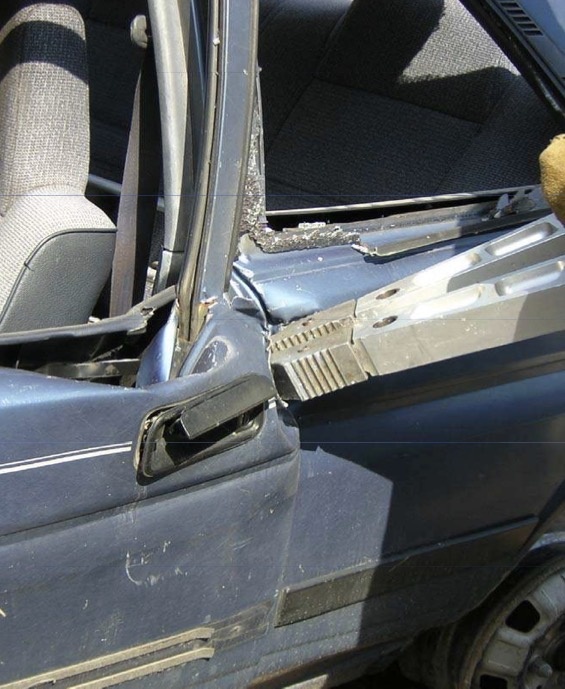
- Keep spreading until the latch releases.
- Control the door with webbing and pull it away from the patient.
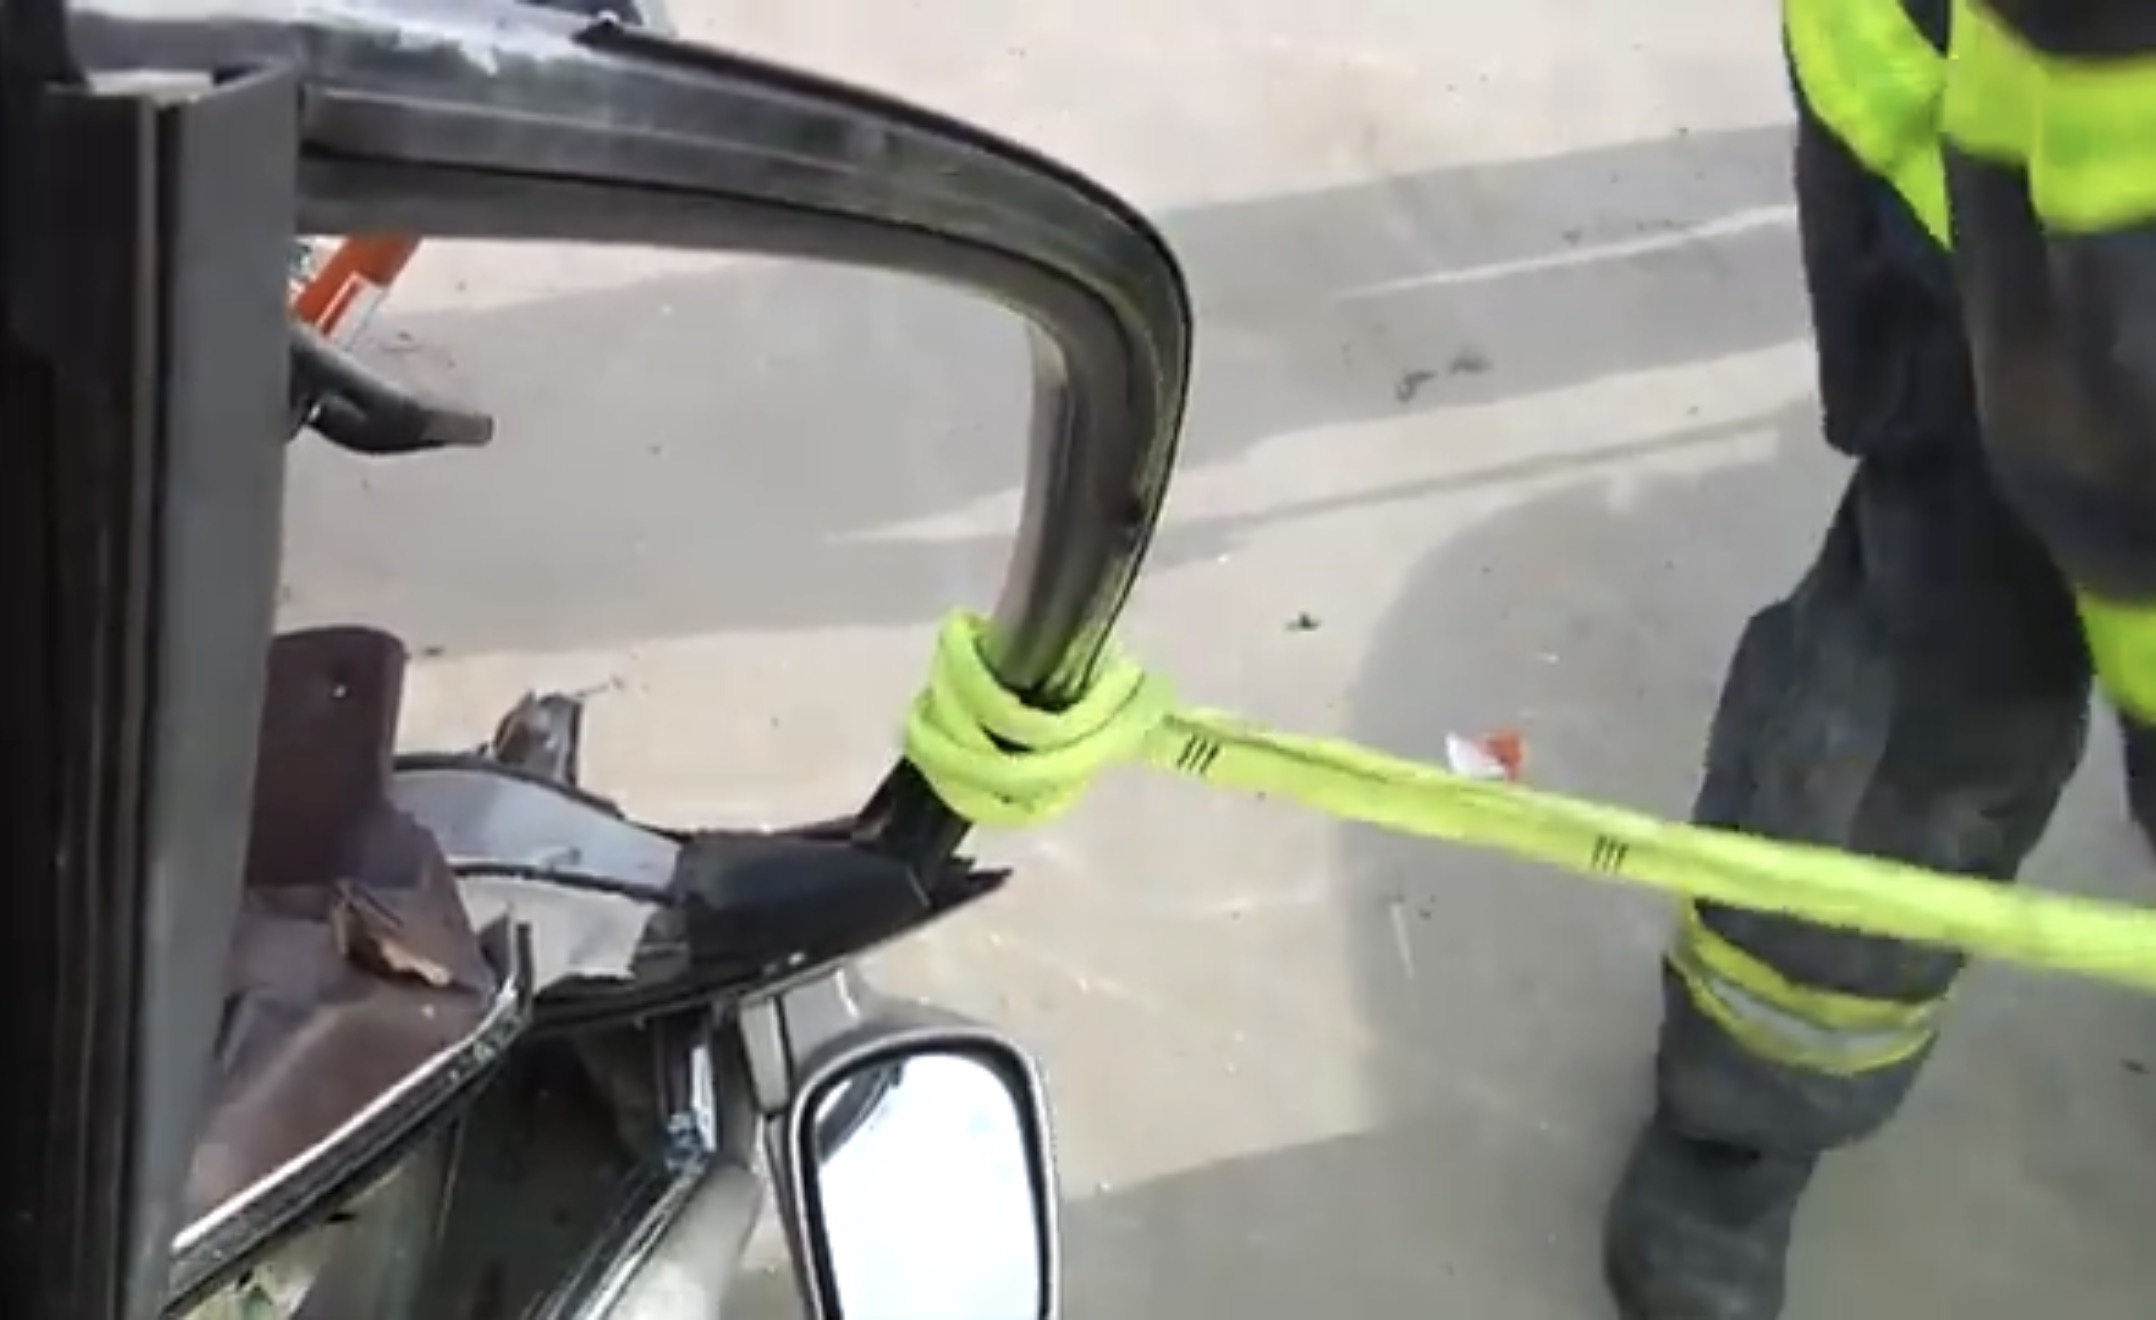
ToolsHalligan · spreaders · cutters · webbing
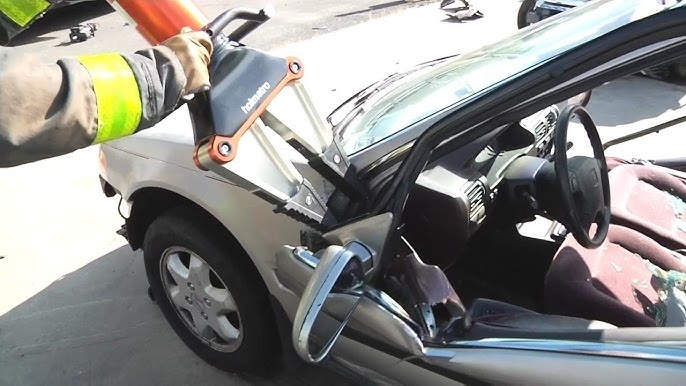
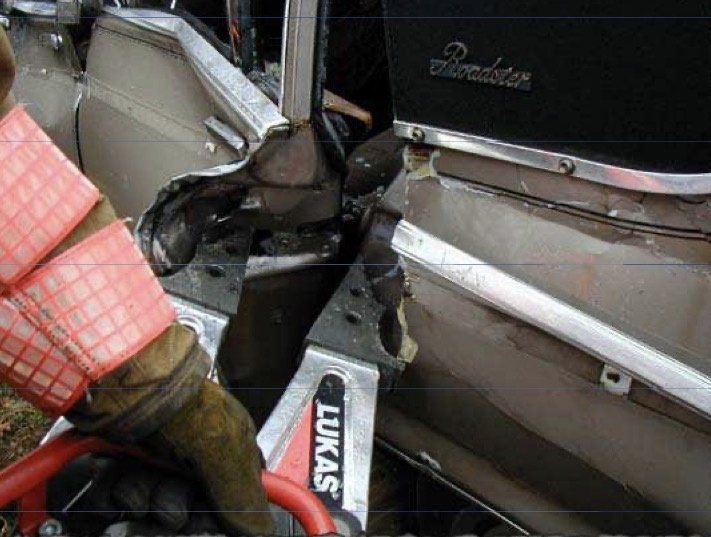
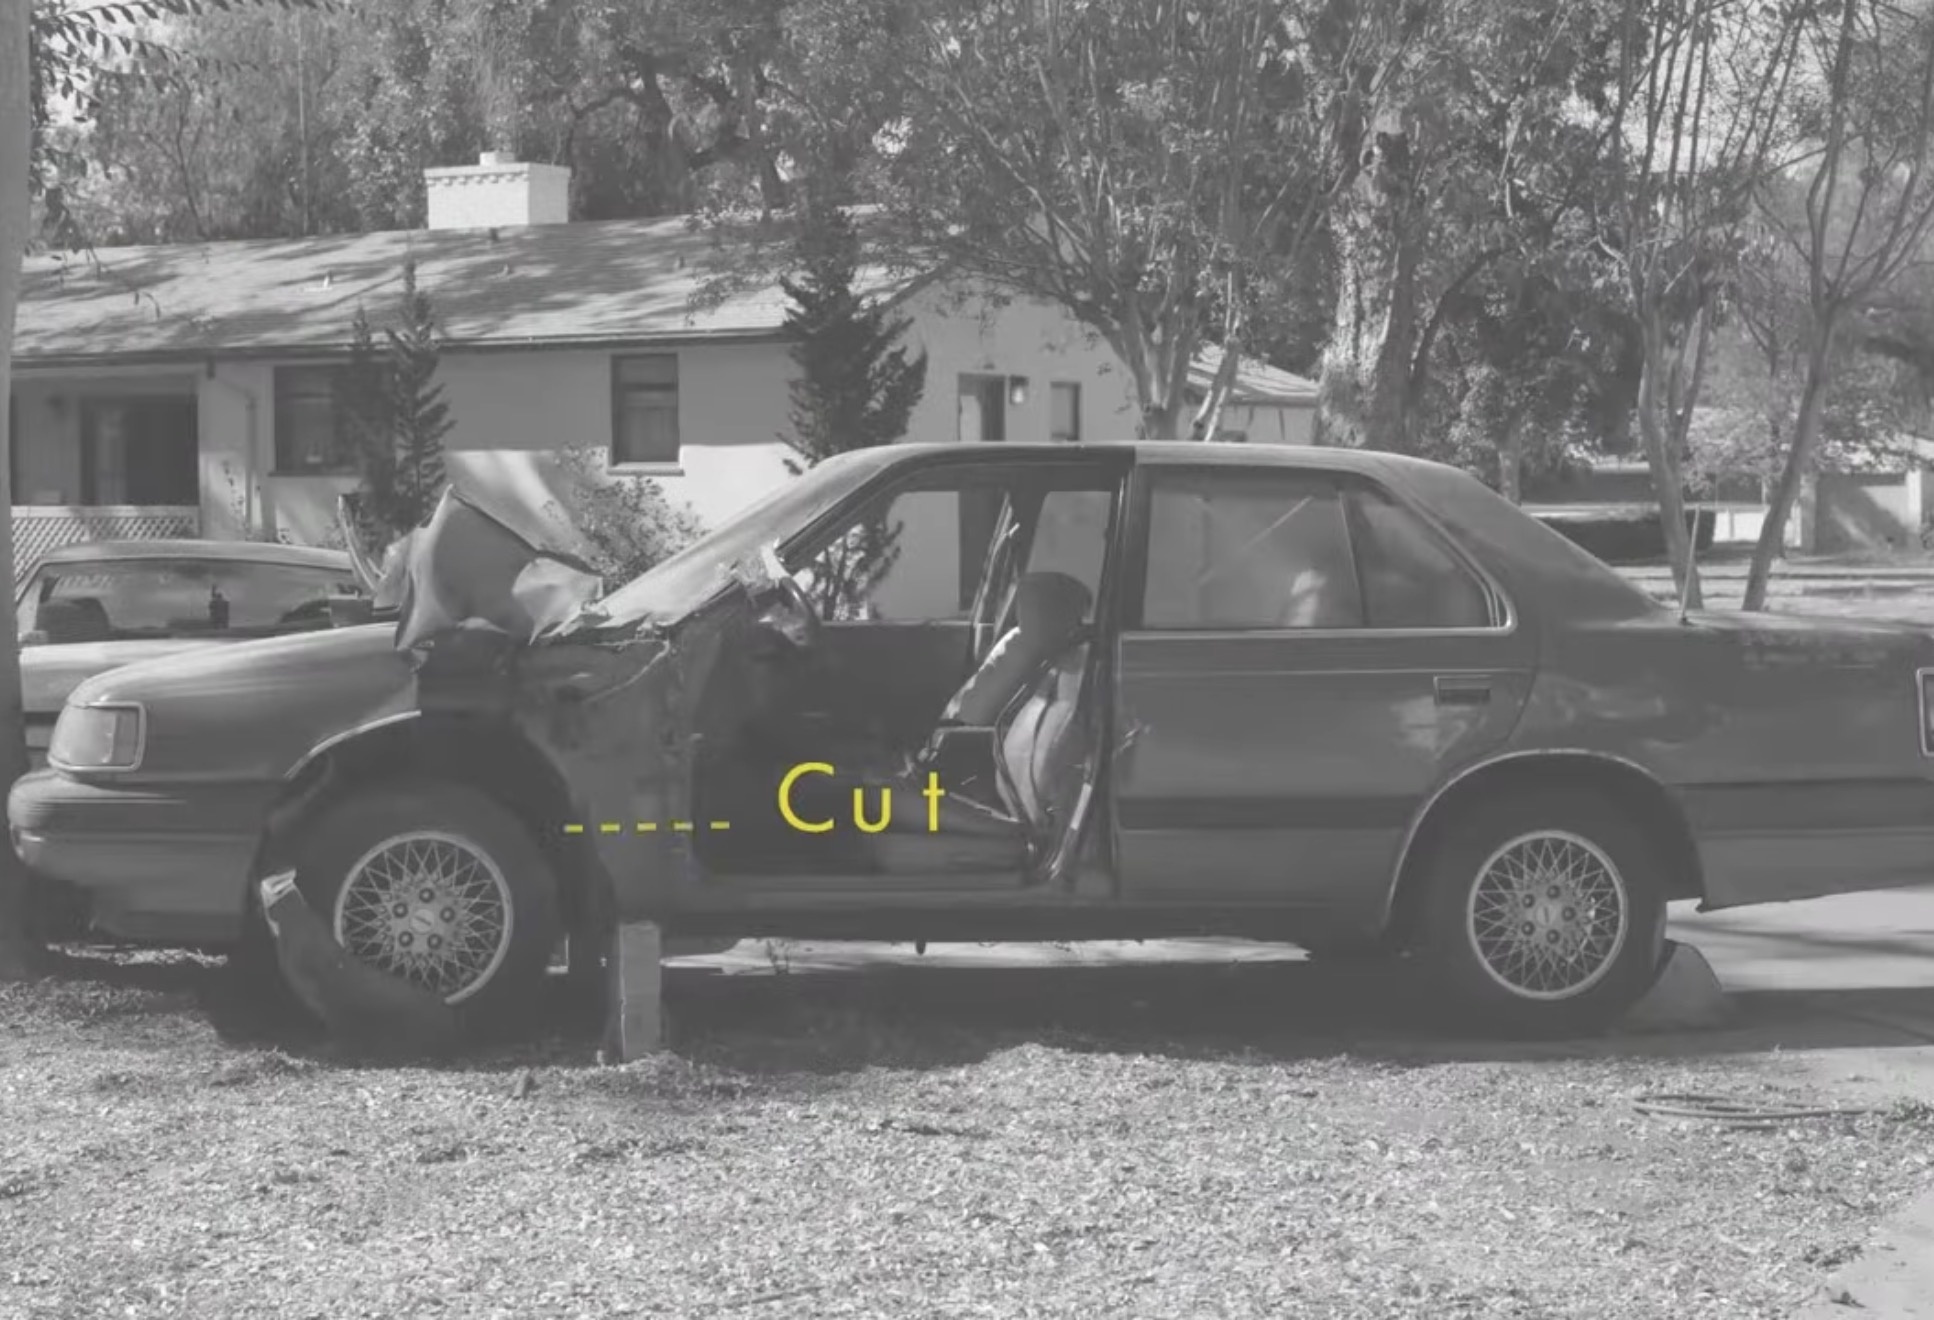
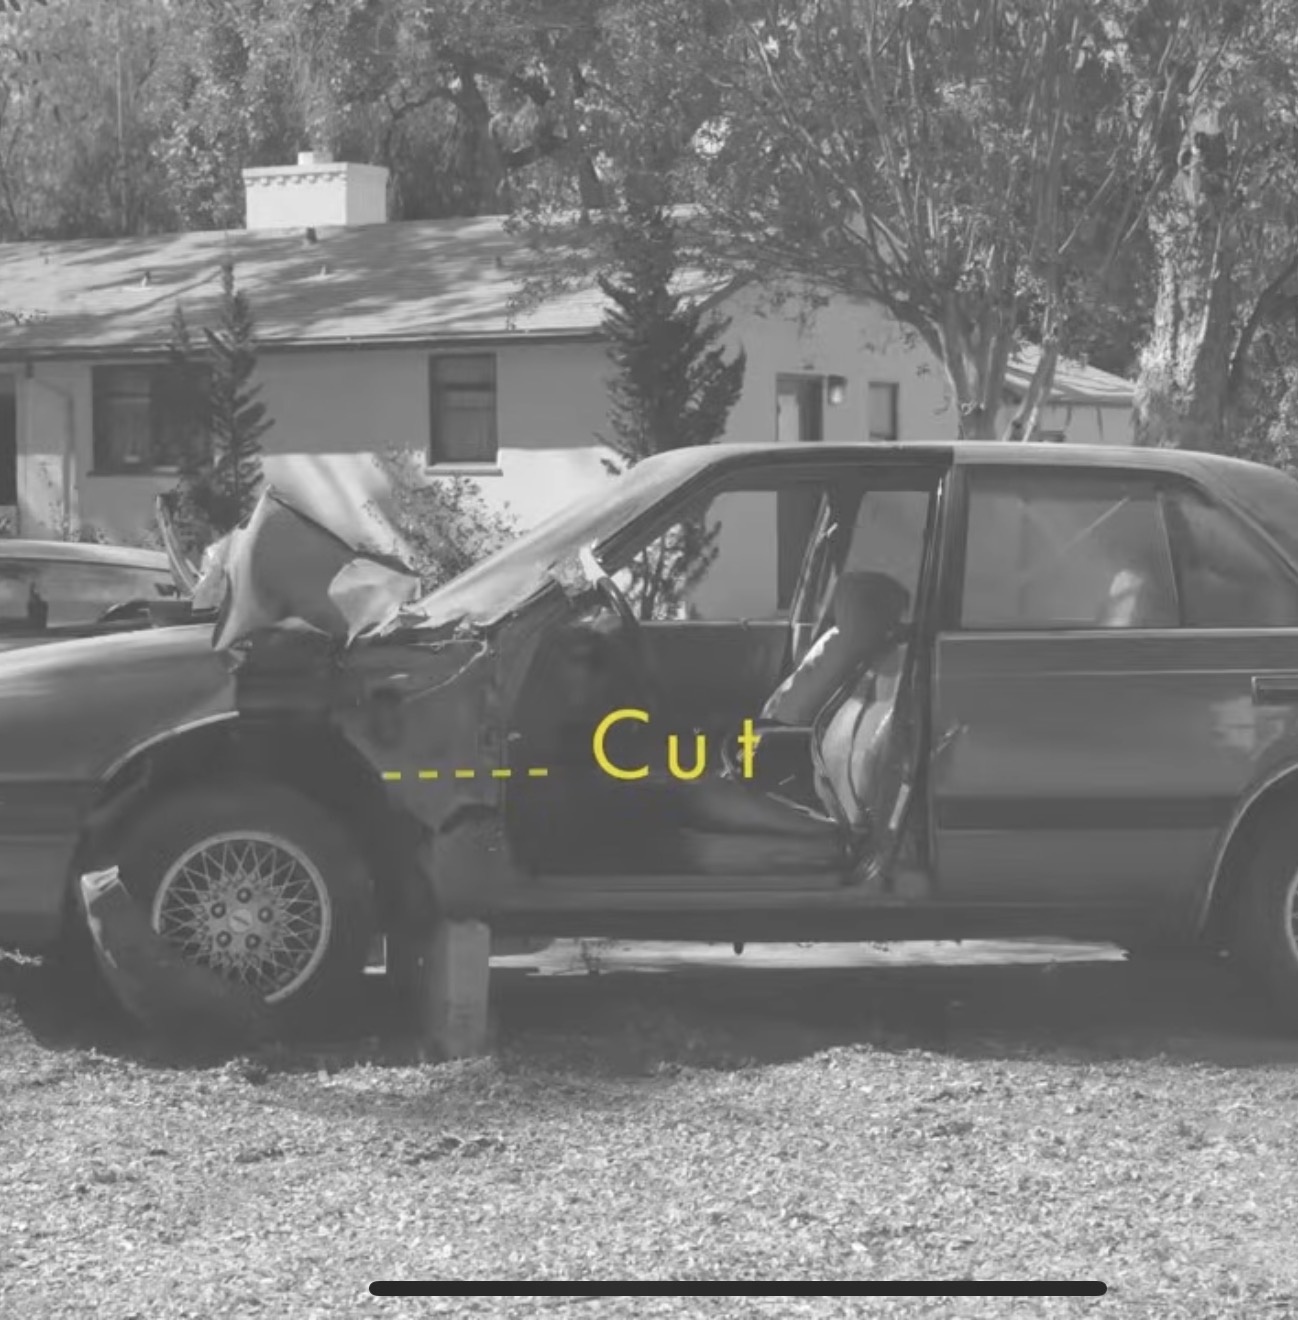
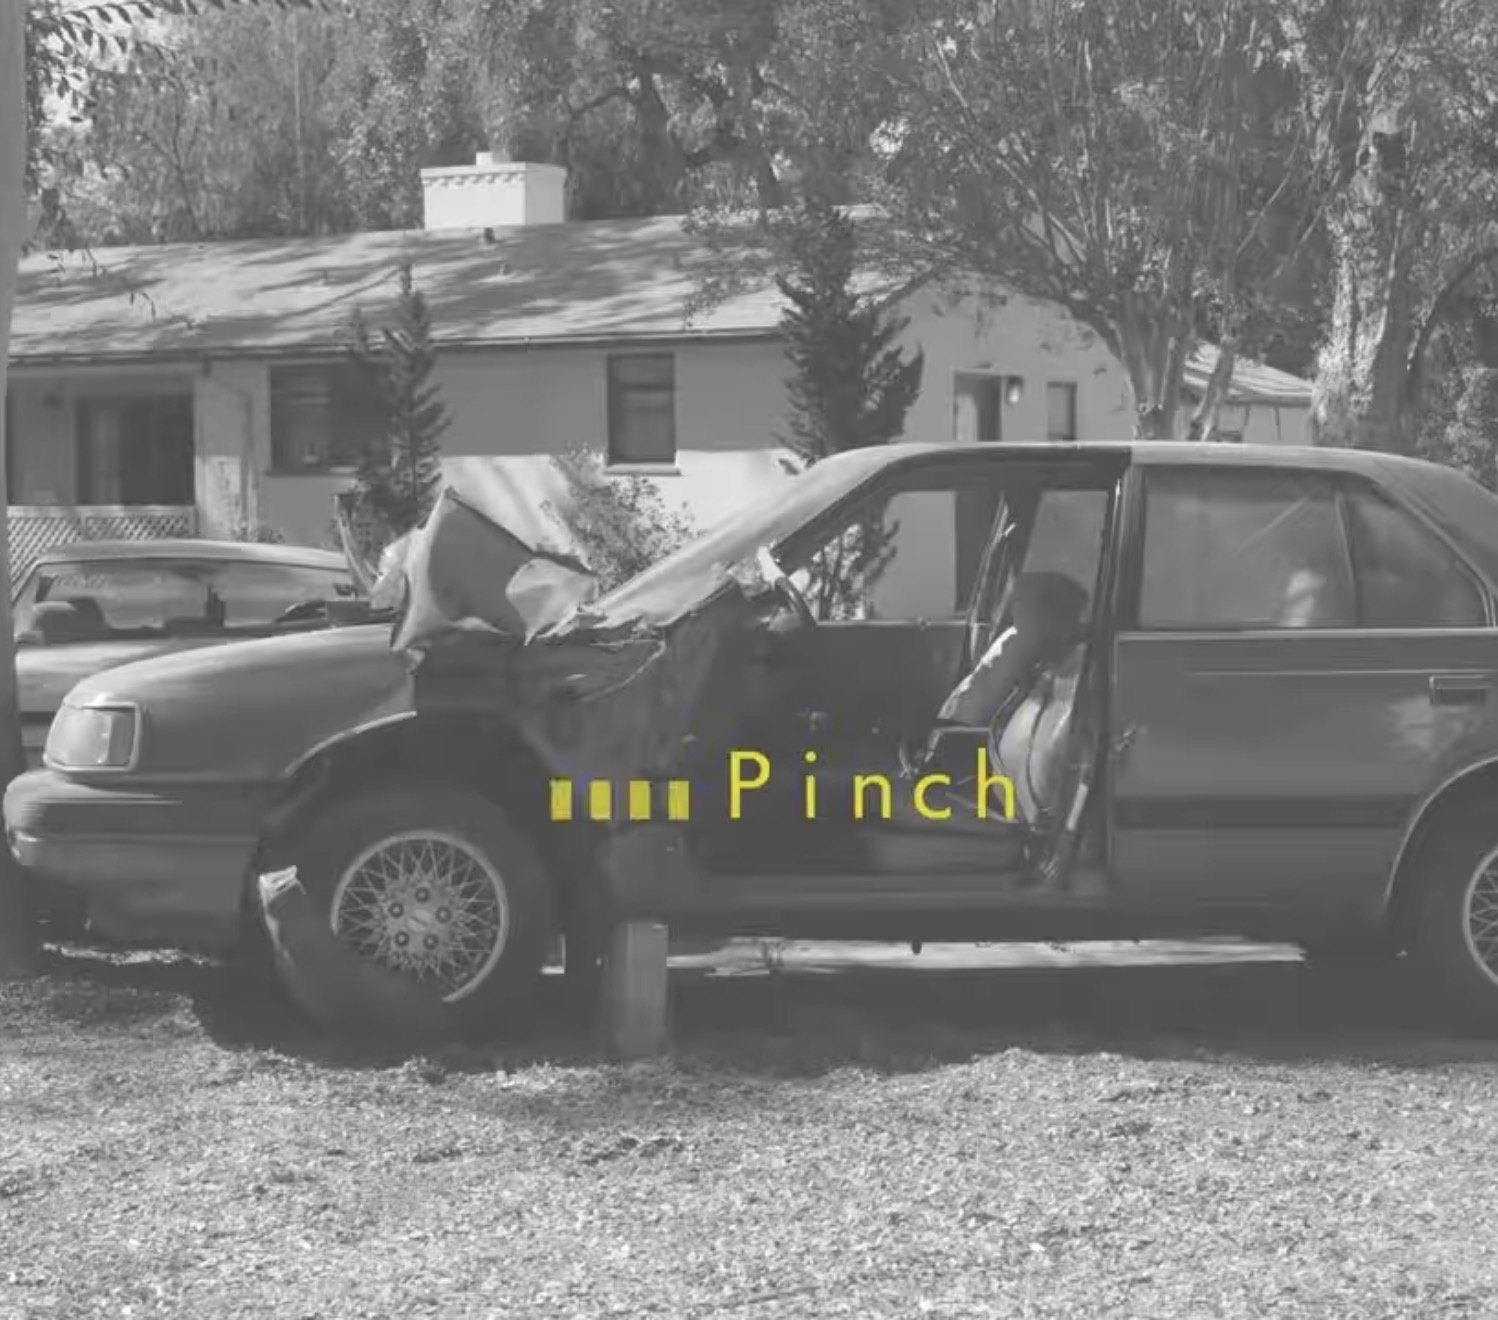
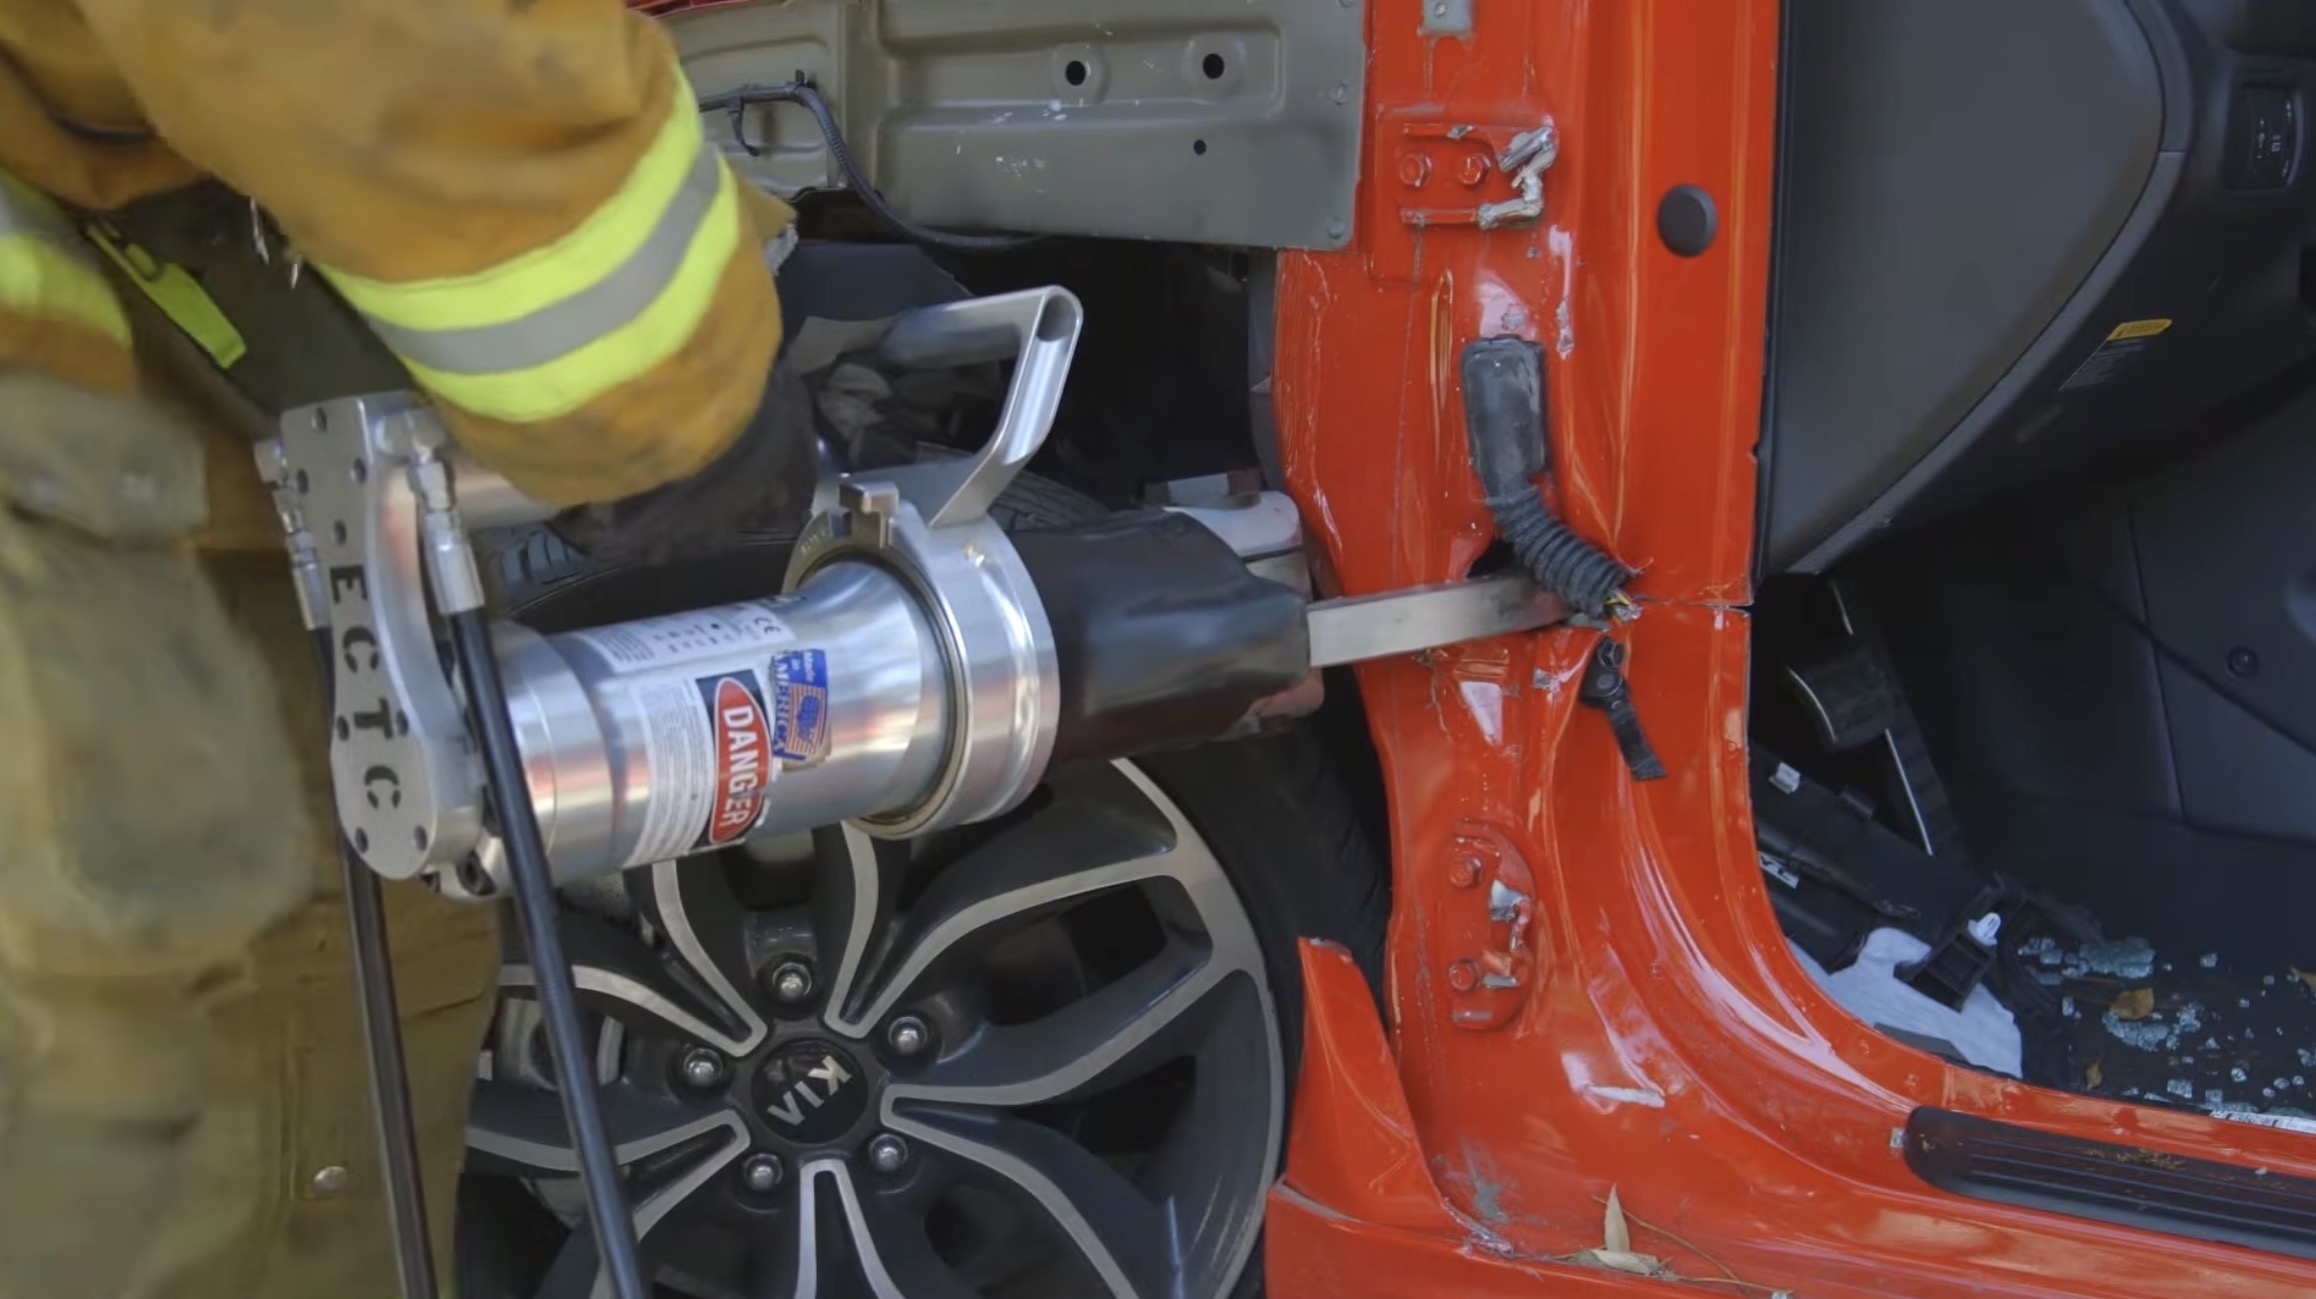
3 B-Post Blow Out Side removal ›
- Create a purchase point with the spreaders — spread in the window, or pinch the door.
- Pop the door at the Nader pin using that purchase point.
- Base cut: cut the B-post as low as possible, parallel to the rocker panel.
- Spread the bottom of the B-post outward, away from the patient. Stabilize the rocker panel underneath to support the spread.

- Top cut (last): once the base is free of the rocker, make the final top cut while keeping door control.
- Spread and cut the front door hinges, maintaining door control with webbing.
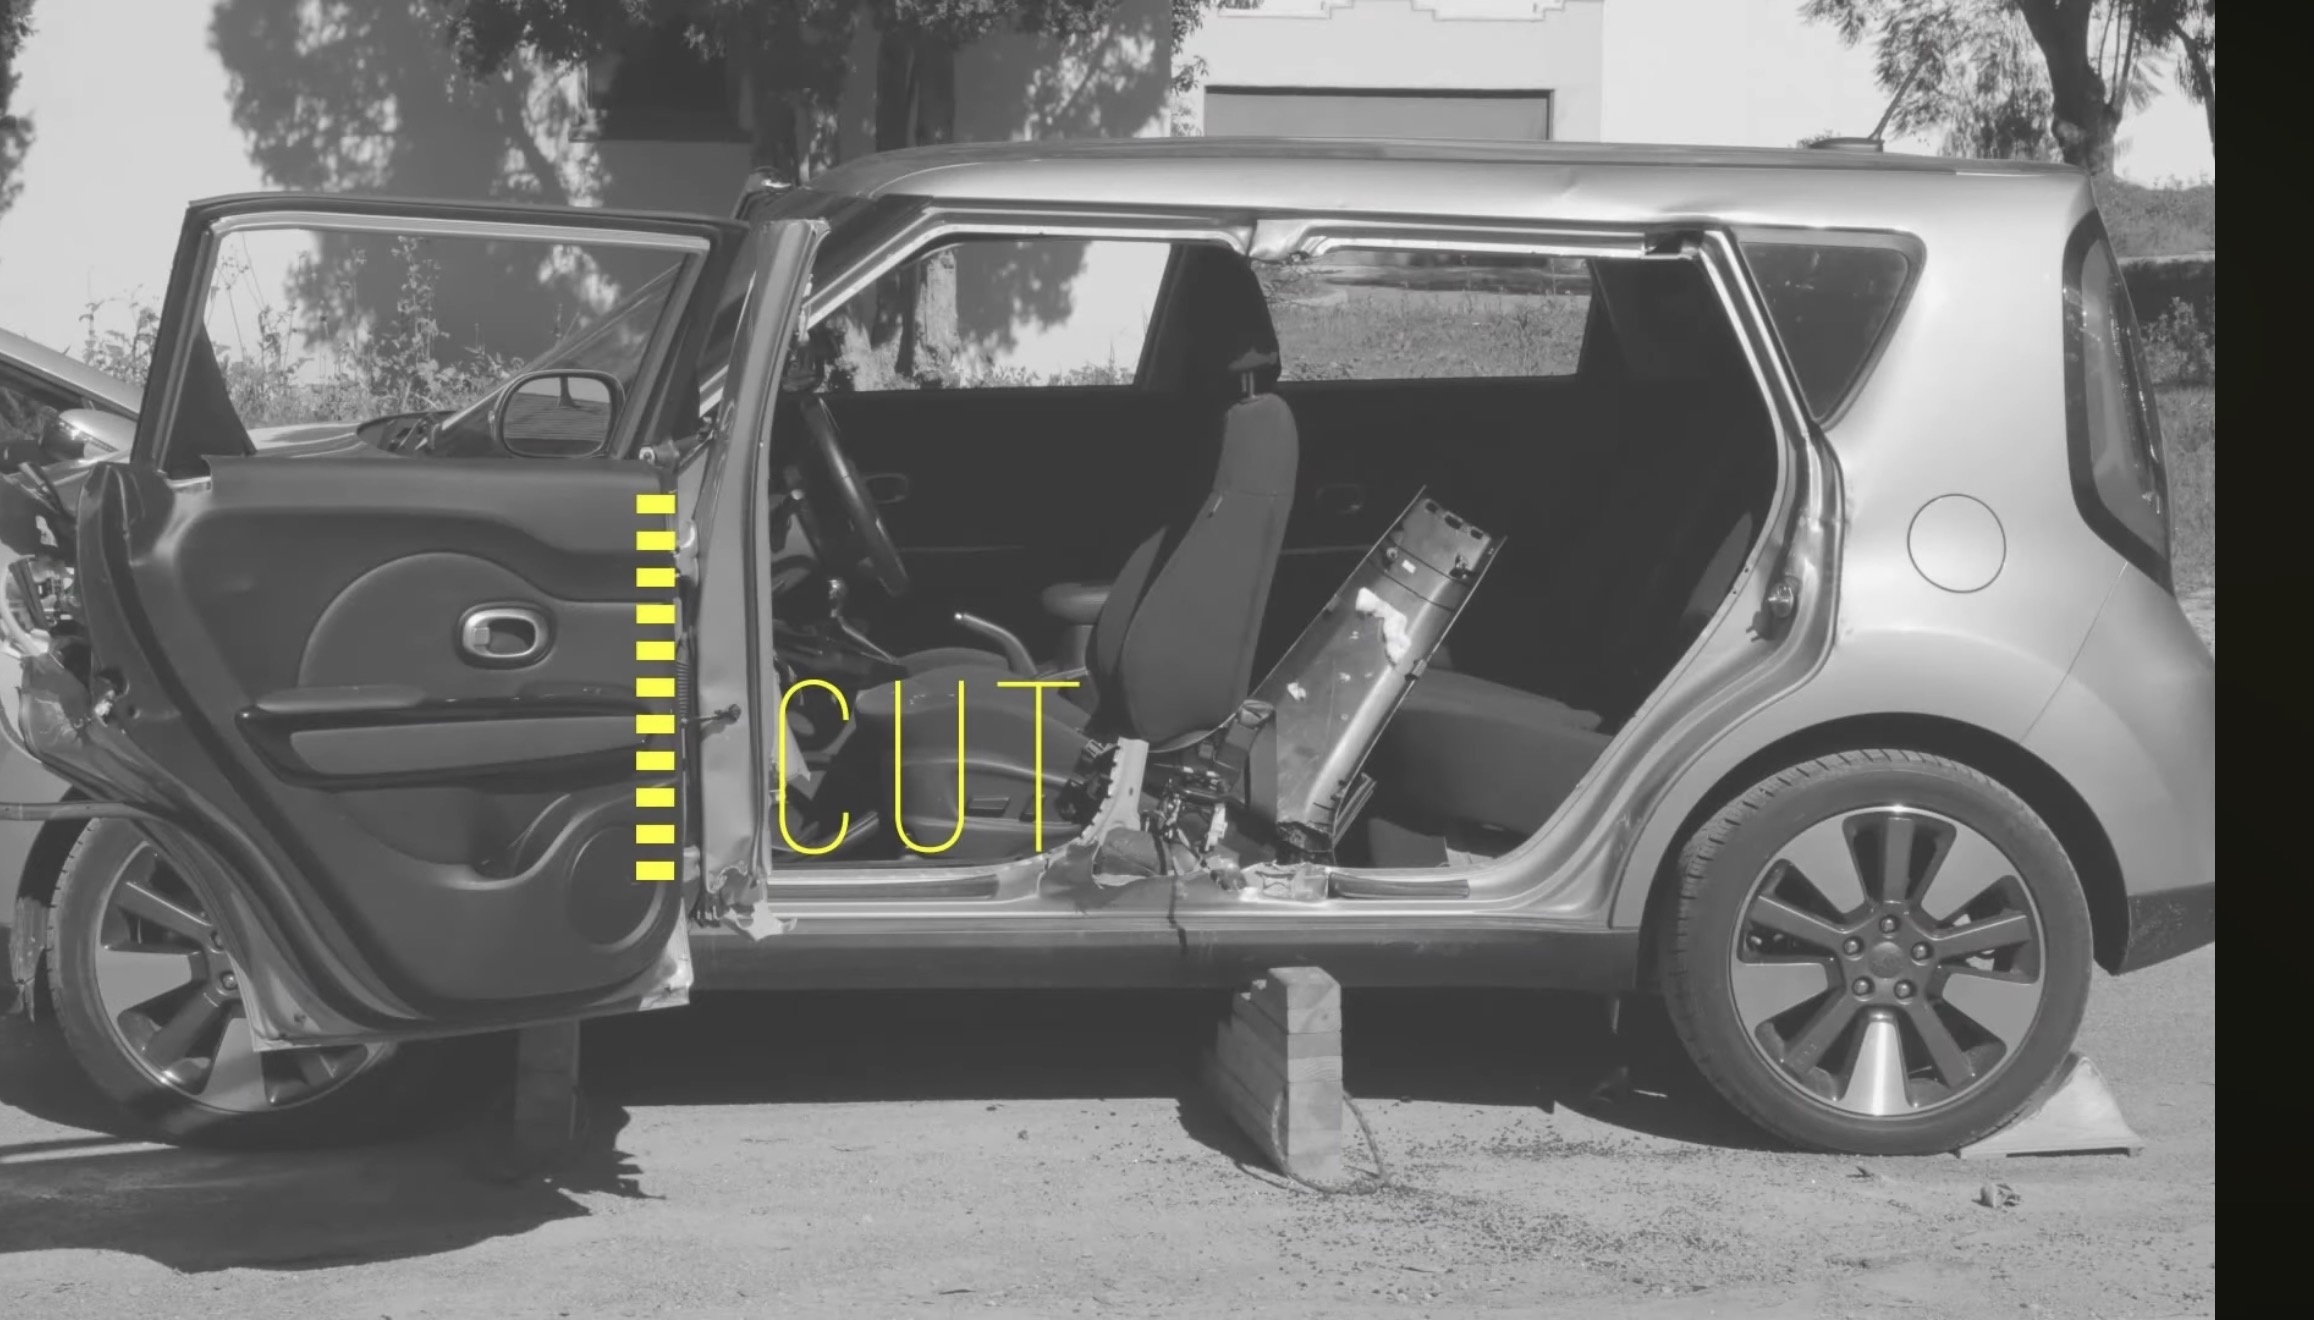
Cut order
Cut the bottom first. If you cut the top first, the top of the pillar can swing inward toward the patient’s head as the base blows out. Blow the base out fully (or nearly), leave the top intact, and make the top cut last.
⚠ Hard Rule
Avoid cutting the seat-belt pretensioners.
ToolsSpreaders · cutters · webbing
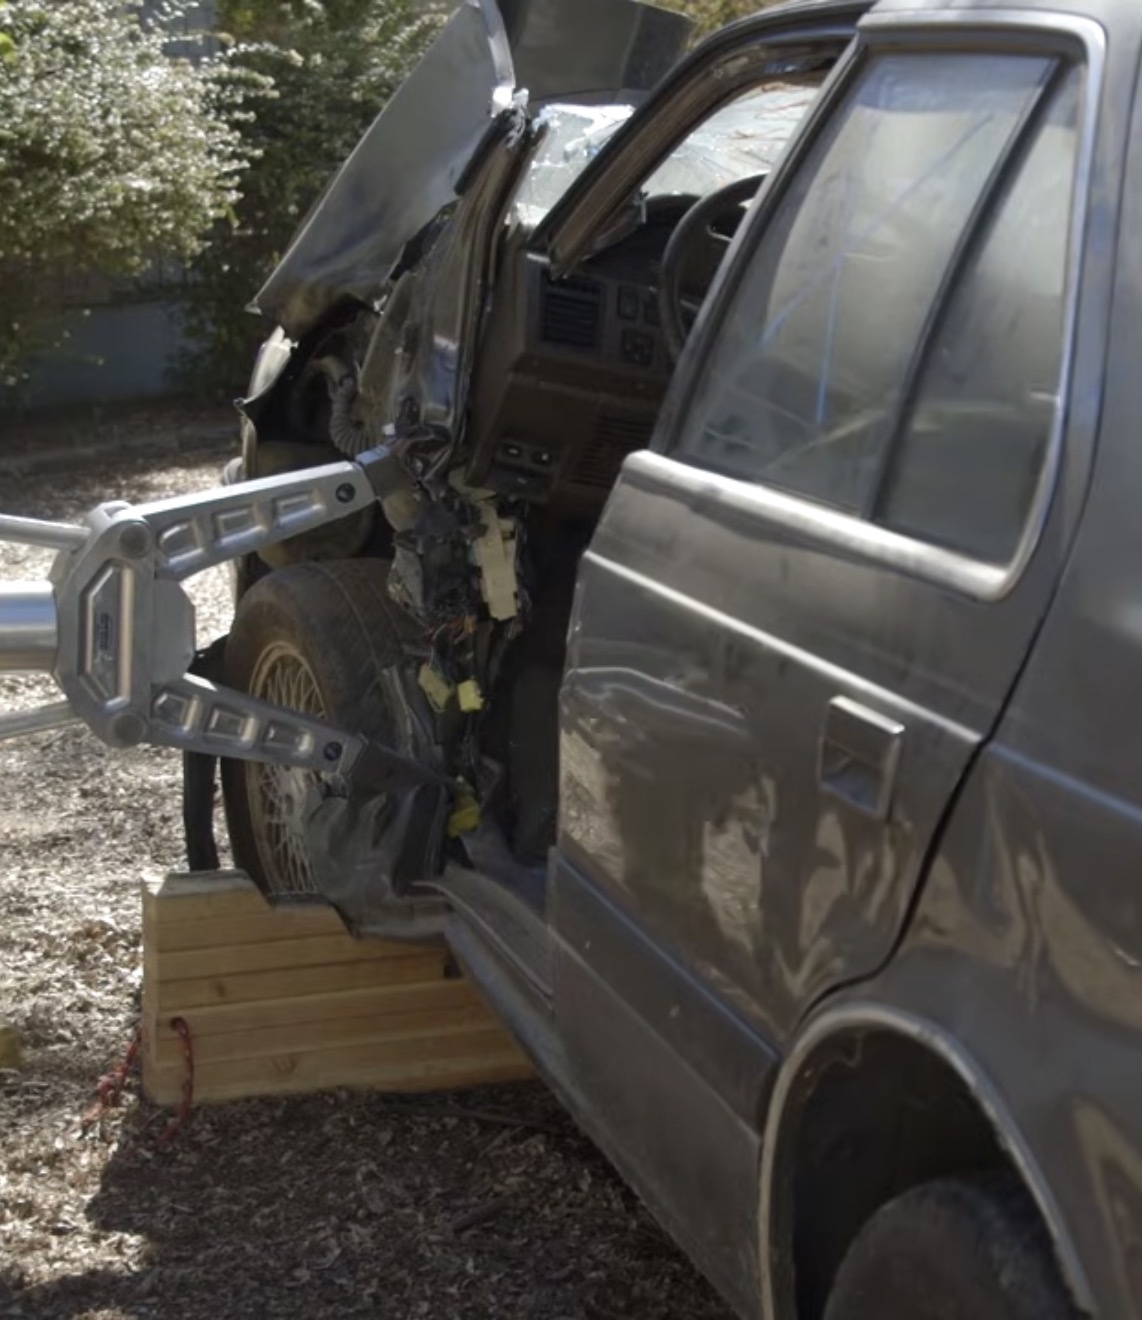
4 Dash Jack Dash displacement · spreaders ›
- Stabilize under the A-post — this strengthens the area you’ll leverage to lift the dash.
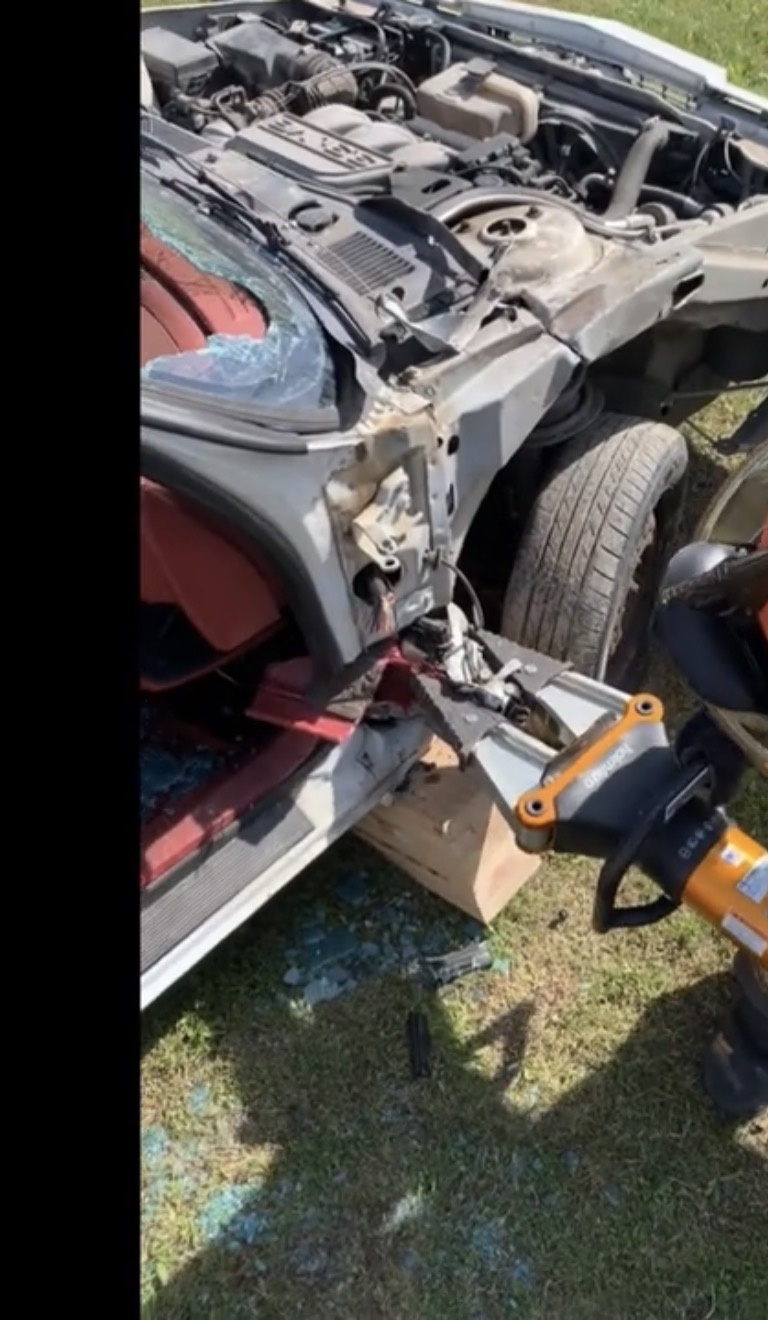
- Relief cuts — make three:
- ACut the A-pillar twice and take a chunk out, so the metal can’t snag.
- BFront cut: peel back the sheet metal to expose the beam, then cut between the strut and the passenger compartment.
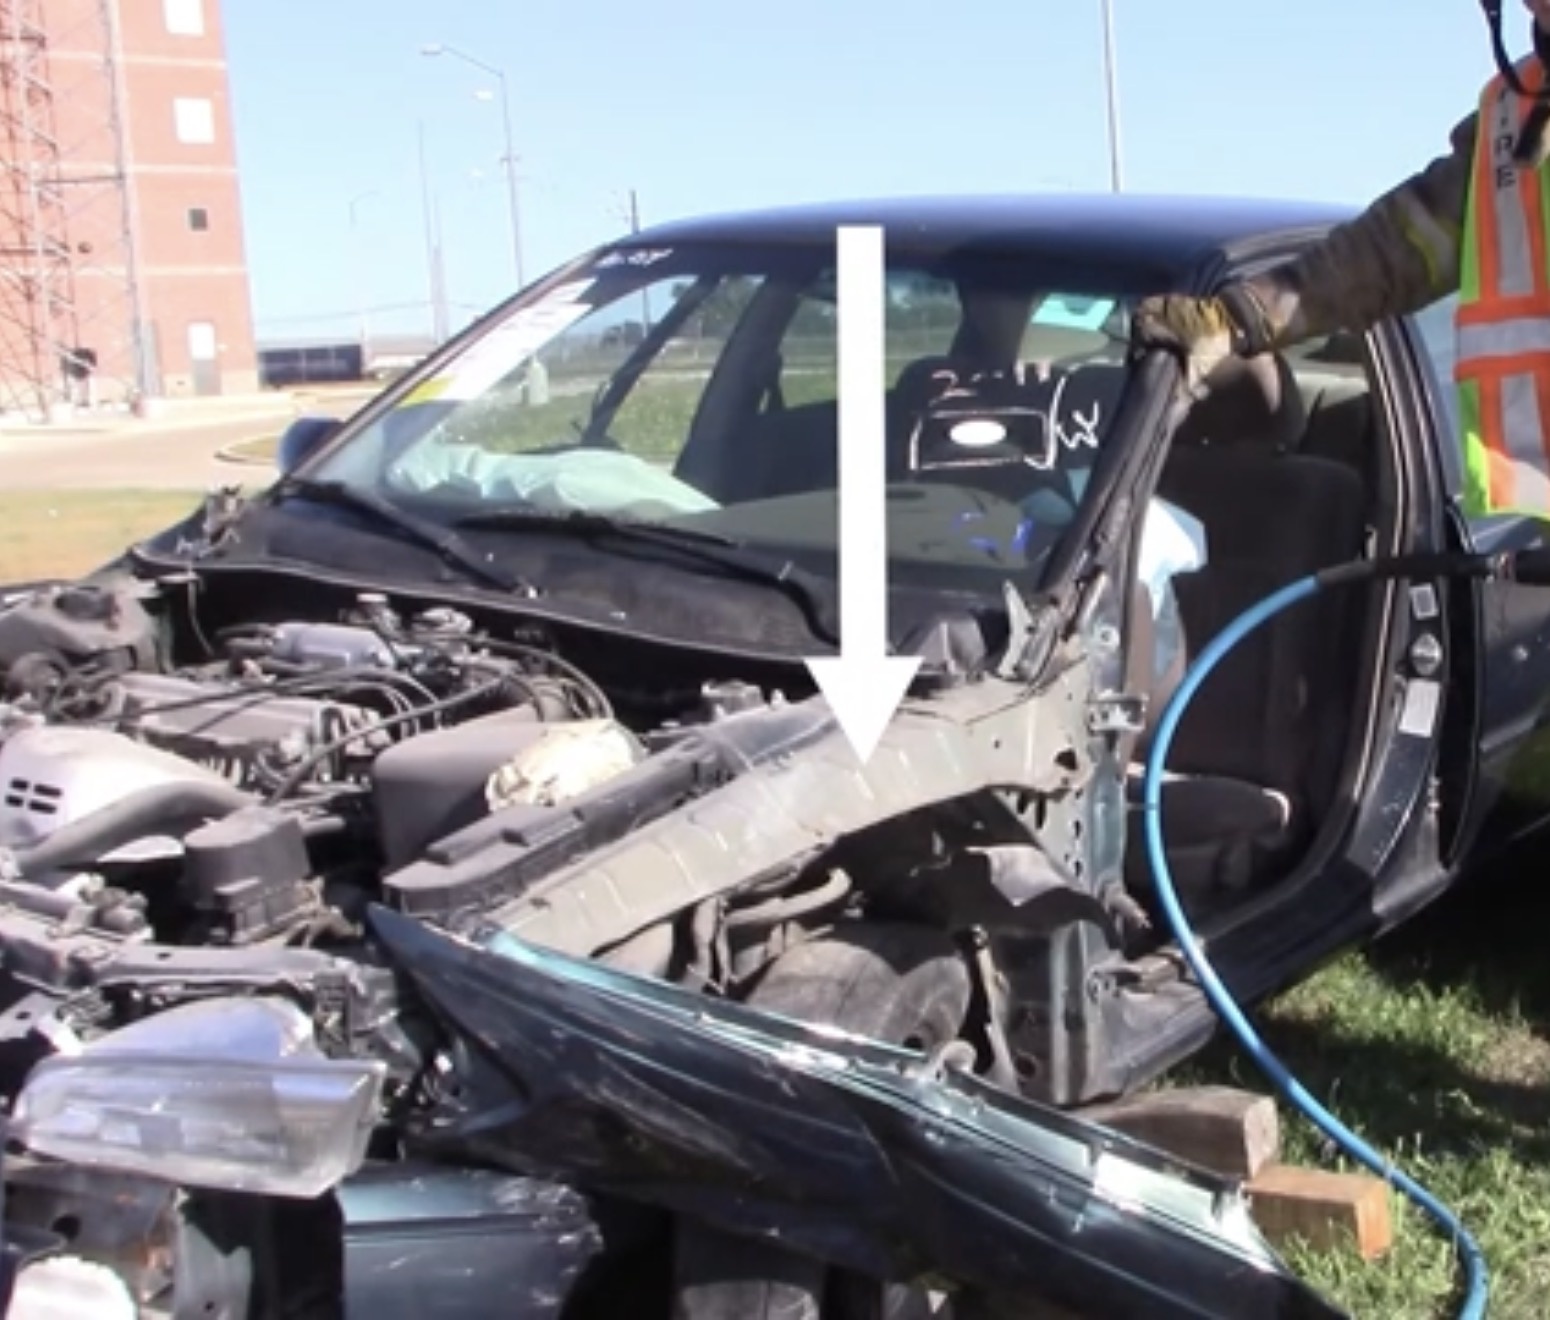
- CLower cut: parallel to the rocker panel.

- ACut the A-pillar twice and take a chunk out, so the metal can’t snag.
- Jack the dash with the spreaders.
ToolsCutters · spreaders
5 Roll Dash Dash displacement · ram ›
- Stabilize under the A-post — strengthens the area you’ll leverage.
- Relief cuts — make three:
- ACut the A-pillar twice and take a chunk out (prevents snagging). Leave room at the bottom of the A-post for the ram.
- BFront cut: peel back the sheet metal to expose the beam; cut between the strut and the passenger compartment.

- CLower cut: parallel to the rocker panel.
- ACut the A-pillar twice and take a chunk out (prevents snagging). Leave room at the bottom of the A-post for the ram.
- Roll the dash: set the ram from the base of the B-post to the base of the A-post and push the dash away from the patient.
- The ram may block patient removal — chock as a progress capture, then remove the ram.
ToolsCutters · ram · chocks
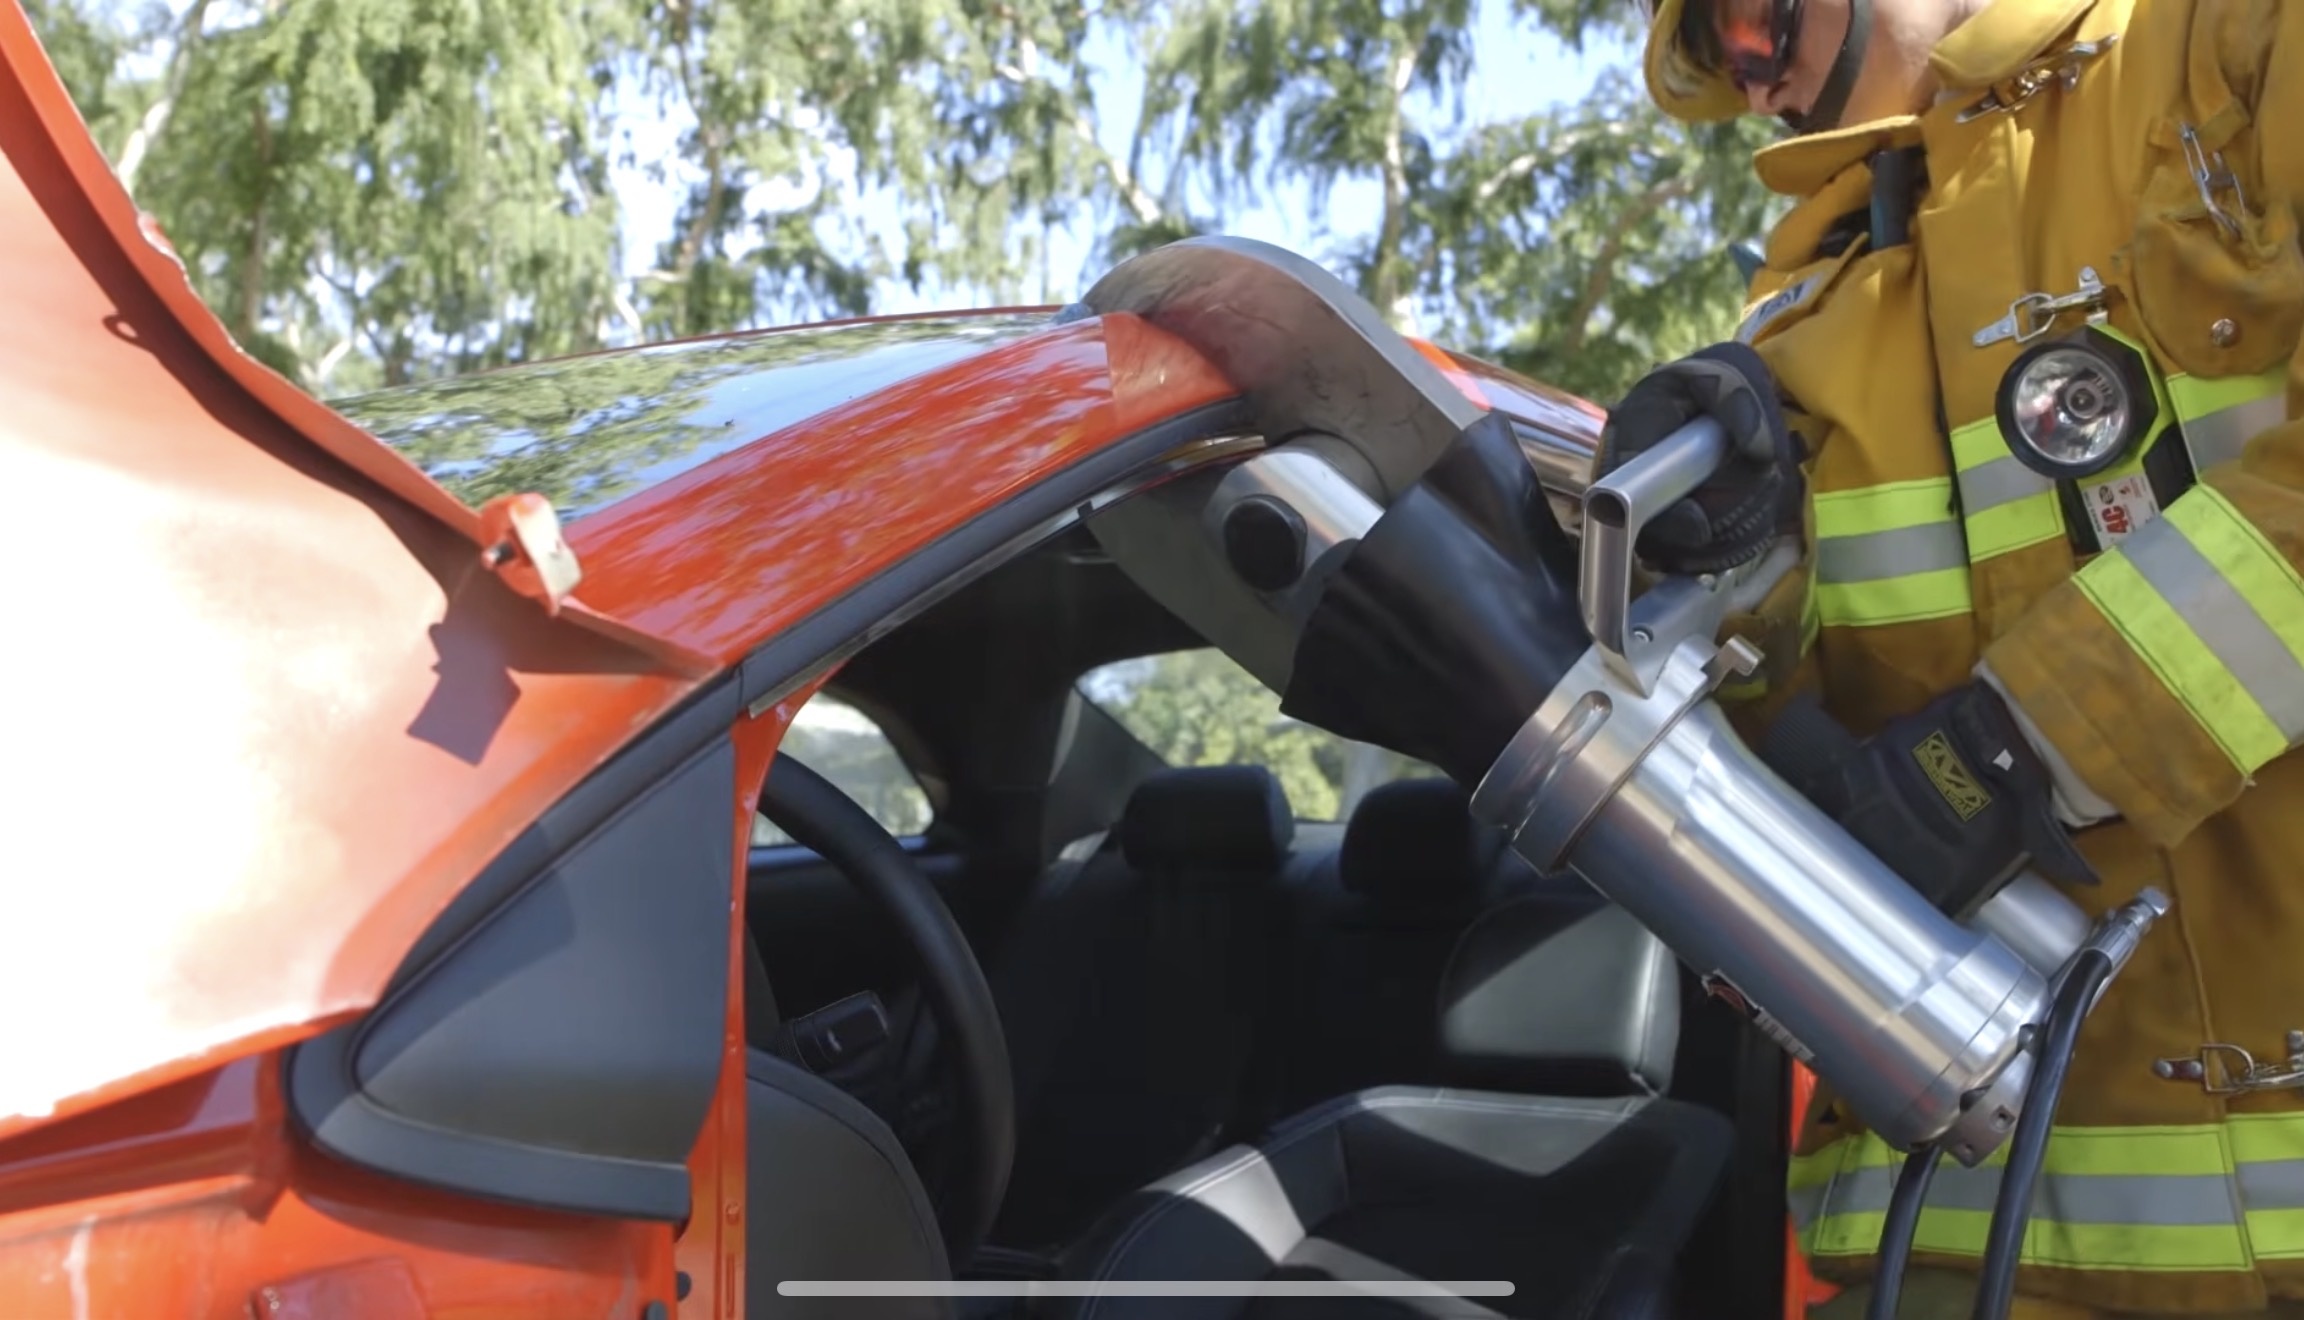
6 Roof Removal Full roof ›
- Remove all glass first.
- Cut the A-posts low, near the dash — avoids sharp edges.
- Cut the B and C posts high, near the roof.
- Use a Sawzall for the larger posts.
- Be ready to catch the roof — a firefighter on every corner.
⚠ Hard Rule
Biggest hazard is cutting into airbag cylinders — know where they run before you cut.
ToolsCutters · Sawzall
7 Steering Wheel Displacement Not yet documented ›
Steps to be added — not included in the source notes yet.